
I helped my daughter-in-law and son with their wedding 3 years ago, before I started my blog. Since I have so many photos from the lovely day I thought I’d go ahead and post it.
First thing I would tell any bride/groom (or yourself if you’re the bride/groom) to do is get magazines and research the hell out of Pinterest. You need to get an idea of the style of wedding you want. I love the trend of having a personal wedding that really speaks to who the happy couple are instead of the standard church / banquet hall weddings. You’re wedding should look like you. You shouldn’t fit into some boring mold of what a wedding is supposed to look like (for the last century anyways because I’m sure weddings were a lot different a couple of hundred years ago). If you don’t have a specific style already picked out then think about your family heritage or a place you and your soon to be spouse traveled or always wanted to travel to. Think about what you do in your spare time. All the things that make you you then start there. Google those ideas, search them on Pinterest and make a little notebook of what you want.
Now that you have the notebook, start to whittle down the ideas into one idea. Maybe you like bohemian and beach and Paris. You’ll either need to combine some of those themes or eliminate some. You can do a bohemian Parisian theme or a bohemian beach theme. Once it’s narrowed down to a specific theme, STICK TO THAT THEME. You’re going to see ideas you love when you’re searching the web. Just keep telling yourself – that’s not my theme. Stay focused or you’ll have a thousand things going on and you won’t be able to decide on anything.
Once you have your theme pick a location that best suites that theme. Don’t get hung up on where weddings usually are. My son was married in a bar, and it was beautiful. Pick a place that already has the vibe of your theme – less decorating which means less money and less time.


If you want it to feel like the woods, find a place in the woods, etc. Don’t try to recreate the feel just find it. Real is always better. And cheaper. Use someone’s beach house or their garden, public gardens, cool bars, old garages. If it’s going to be exposed to the elements though keep that in mind. Don’t have a wedding in an old barn with no heating or a/c in the middle of the winter or summer. And always always always plan for rain. You can plan for a tent and if there’s 0% chance of rain a couple of days before the wedding – I mean 0% chance then cancel the tent. And if it does rain, just go with it. There’s nothing you can do about it. Trust me people will remember your wedding for a long time. You also need to pay attention to how many people you’ll be inviting. Don’t pick a place that holds 500 and you’ll only have 100 it will look bare. And obviously don’t pick a place that holds 100 and invite 500. Duh.
So once you have the location picked out, and booked. You’ve paid attention to the time of year, weather, and head count. Planned for the additional things you might need like tables, chairs, tents, fans, heaters, lighting. All the basic stuff you need. Then you need to think about the food and bar.
Where will it be. Buffet or sit down. Open bar or cash bar (do what ever you want stop worrying about rules. If you can’t afford an open bar don’t have one) My sister bought liquor over the year prior to her wedding and stock piled a bar. At my sons wedding we had 2 signature drinks, beer and wine. Because it was at a bar we started with a small amount and just added beer and wine to the tub as we needed it. Which meant no waste at the end. I know most places like Total Wine will let you return stuff if it’s unopened of course.
With the food and bar location and particulars worked out you can figure out the tables and seating for the reception and the wedding if it’s in a place where you can choose were the seating goes. I was recently at a wedding where the ceremony was in the woods they set up an alter type area in the front between 2 trees and had beautiful natural edge benches the groom and his friends made. There were enough benches to make it look like the setting for a wedding but not enough for everyone to sit. Which was fine because the ceremony was only about 10 min long. It was awesome. The standing guests just gathered around the sitting guests it worked perfectly and they didn’t end up with 100 benches after only using them for 10 min.
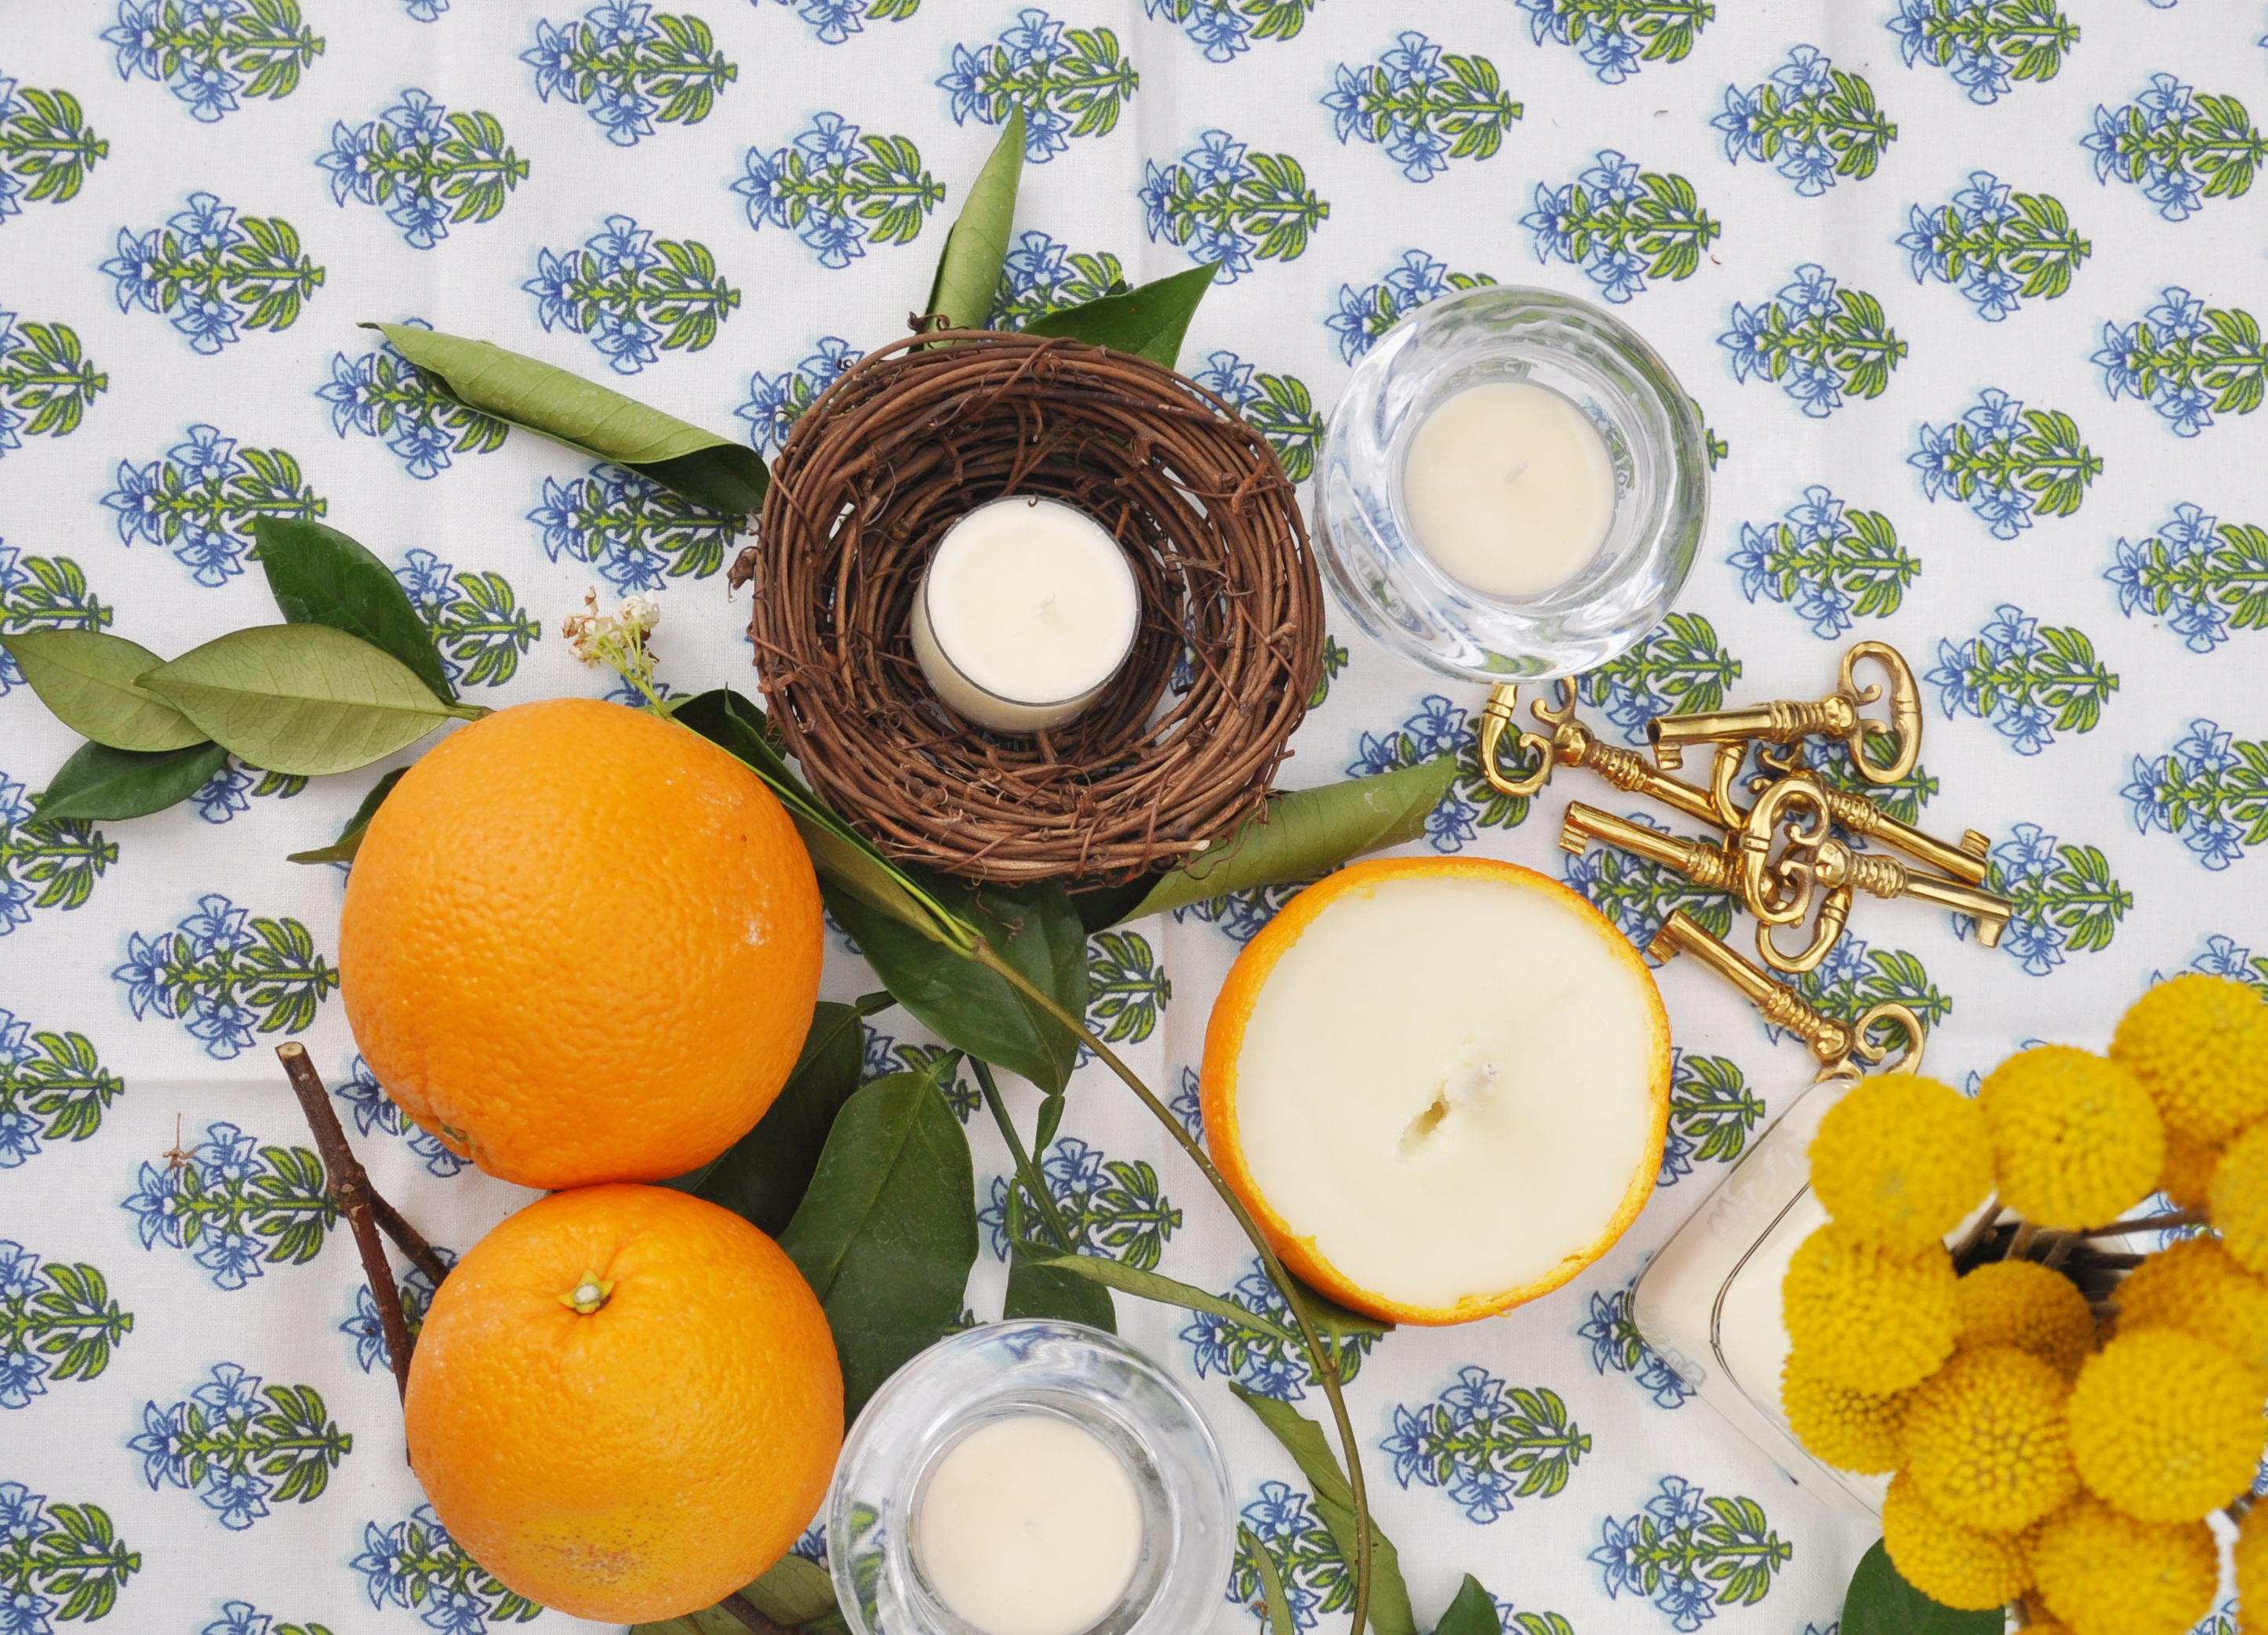
Once you have the table situation worked out you’ll be able to figure out how many tables and what you can afford to do regarding centerpieces for each. If it’s only a few you can go a little more crazy. If it’s 24 tables you need to really think about what you’re using. 24 things will add up really quickly. We used containers we already had, tin cans, jars, my daughter-in-law’s family friend made candles using halved oranges, we used orange leaves, and just used large bunches of flowers instead of having individual arrangements made. We used fabric swatches for table clothes and borrowed candlesticks. Just figure out what you want 1 table to look like then times it by the number of tables you have. Then make a list of what you can borrow and who you borrowed if from so you can return it. I highly recommend tape with their name on it on the bottom. And then list what you need to buy. Craft stores and places like Save on Crafts online are awesome for getting moss, stones, dried flower petals. We had a friend slice some logs for us instead of buying them. The stump with their initials I have in my garden still.

Both my son’s wedding and the recent wedding I went to enlisted the help of friends and family. For everything. The caterer at the last wedding (a friend of the couple) was mowing the field the morning of set up. All of the couples friends and family that weren’t in the wedding were there helping set up. It made it so special to have people you care about helping pull everything together. At my sons wedding we prepared everything, even the food, set everything up. Whike they were getting pictures we put the food out. When it was over we cleaned up. The only thing I would say is a must to pay for is someone to work as waiters during the event. To refill the platters and clean up the tables and make sure the bar is full. $100 a person and you won’t have to worry about it the rest of the evening. Spending a little extra money on an event planner just to help the day of is a really great idea. They will keep everything organized and flowing according to plan so you can enjoy yourself. My favorite it Courtney Ford Events!
When you set up the buffet line use things you already have and buy what’s missing. Think about lighting. You want the table to have lots of levels and make it crowded everything should be close together. Measure how big the buffet table(s) will be then lay everything out on your floor at home in the same square feet. Put a sticky note on each platter to make sure you have everything covered. Be sure to leave space for the napkins, plates, silverware if it’s not on the tables already. That way you only haul exactly what you need to the reception location for set up instead of taking a bunch of stuff because you aren’t sure what you’ll need. Plan it ahead of time you don’t want to be messing around the day of.
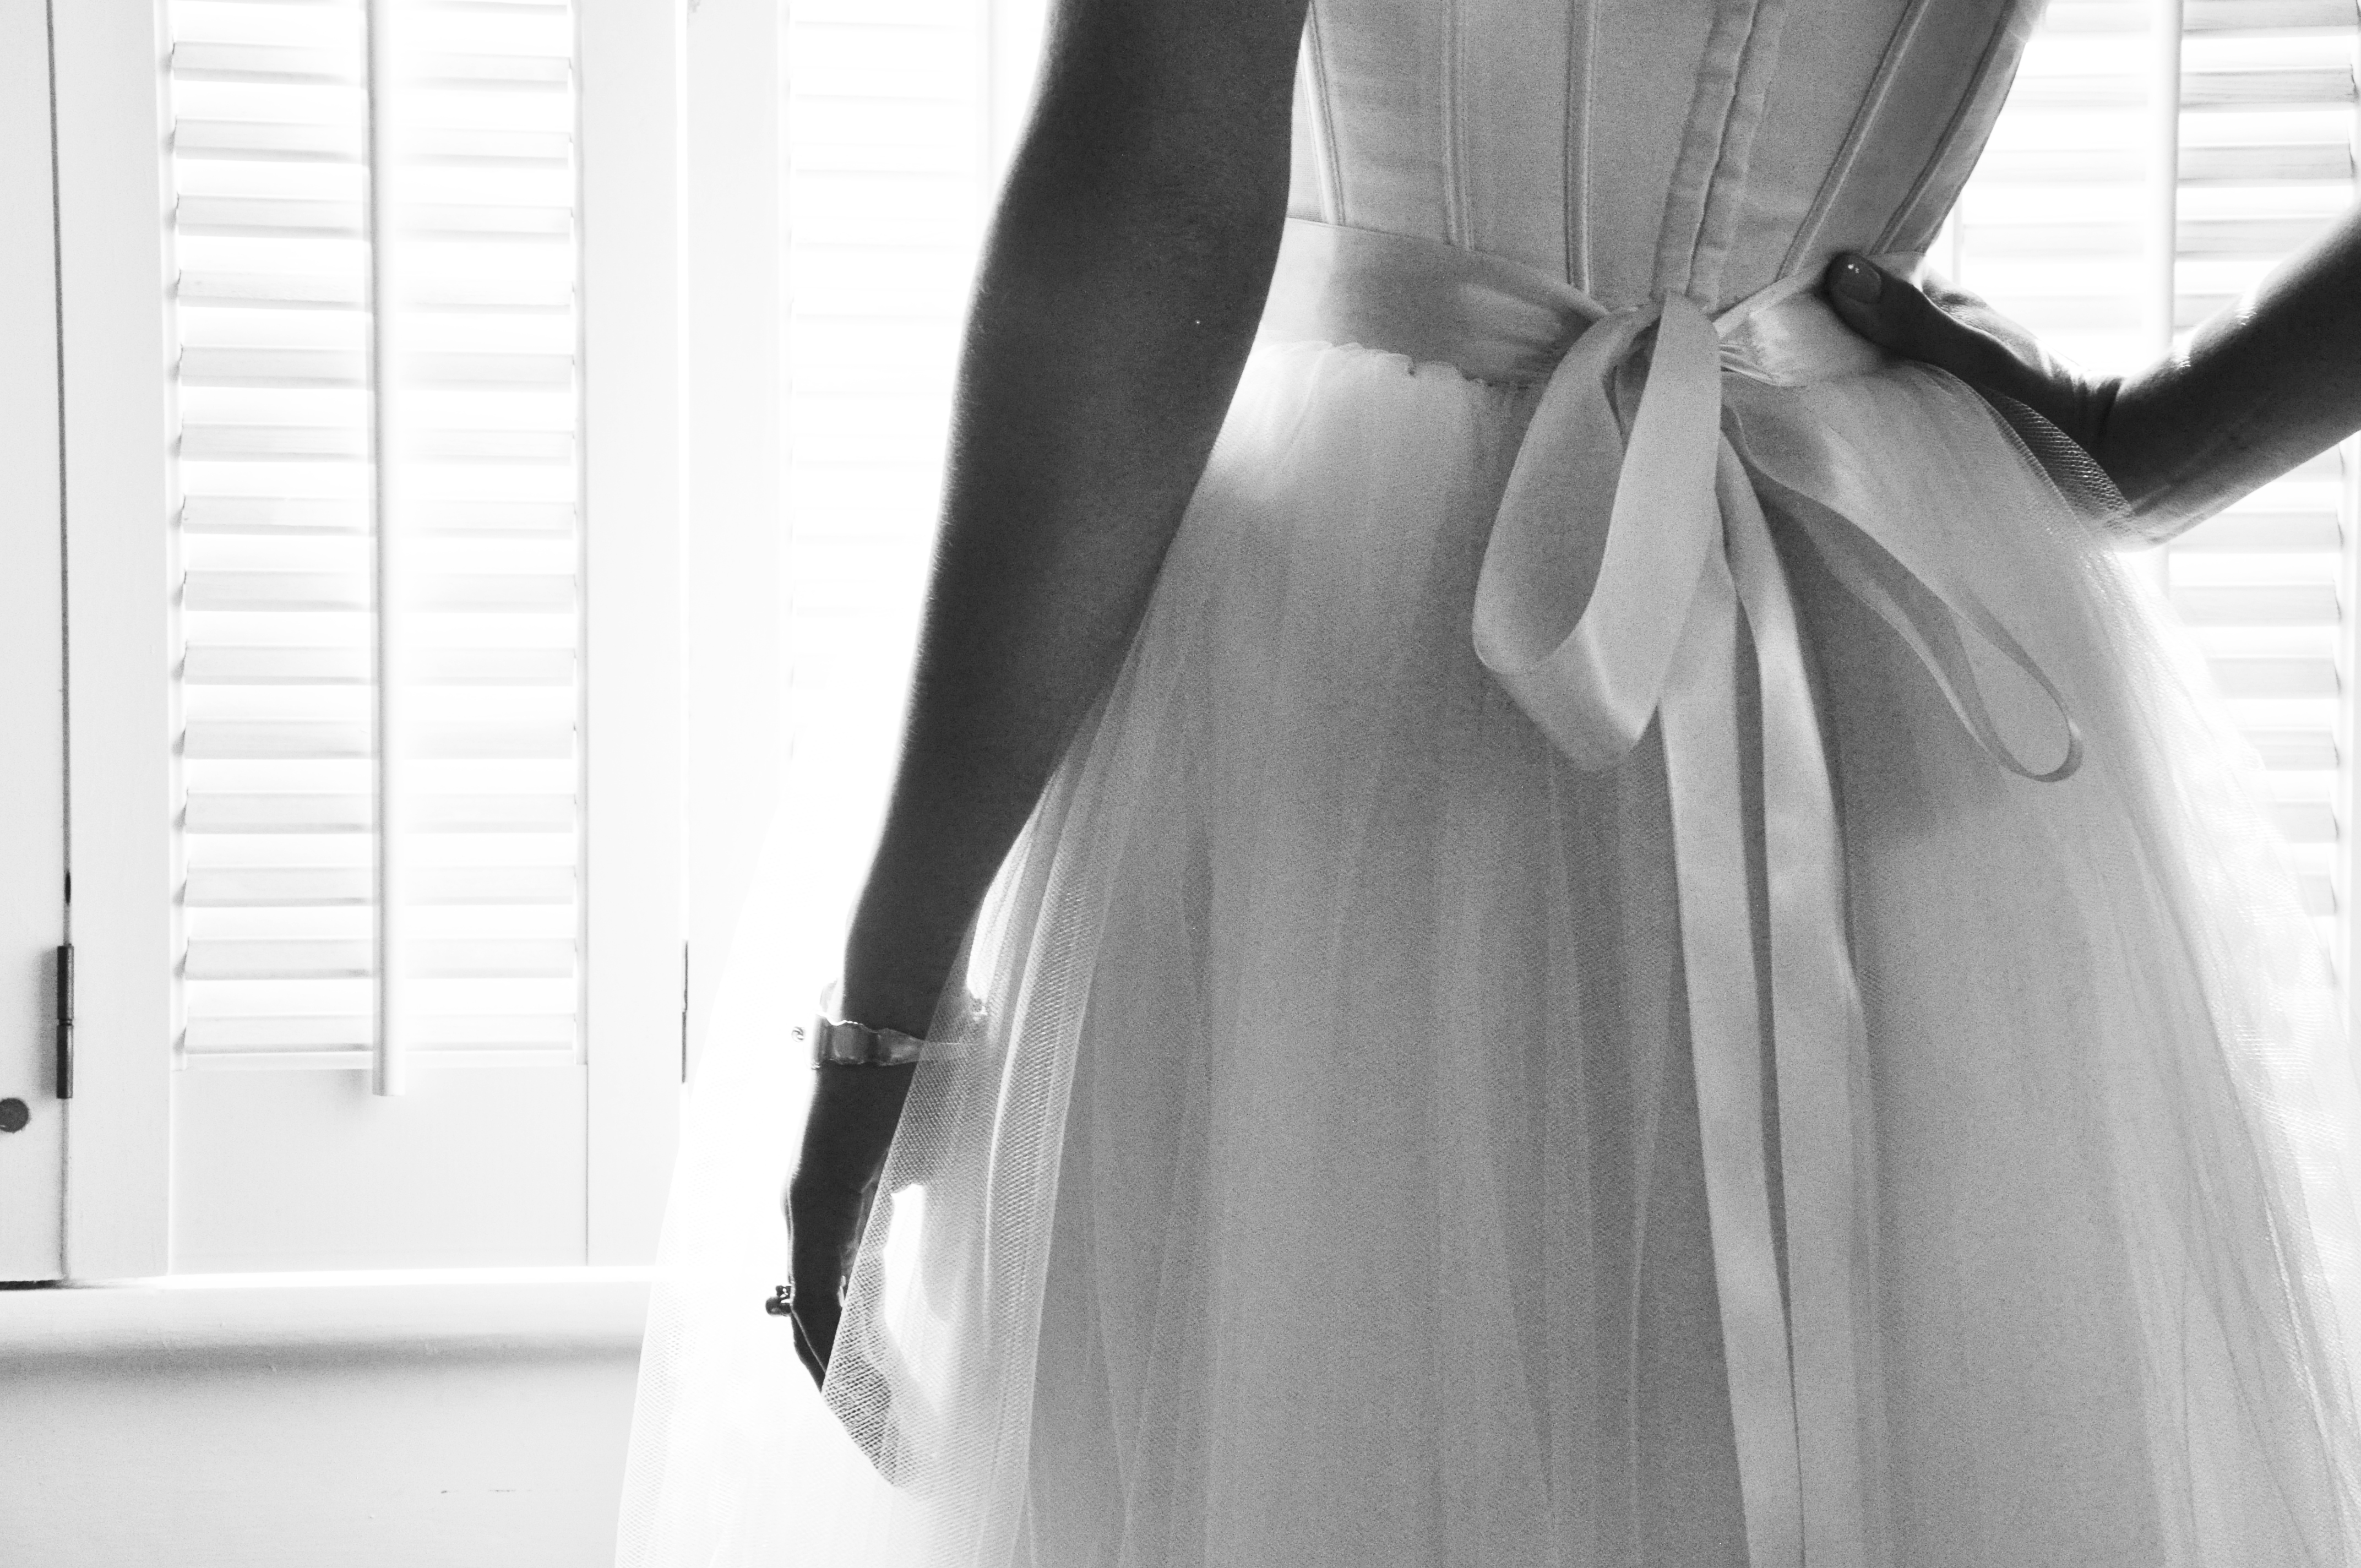
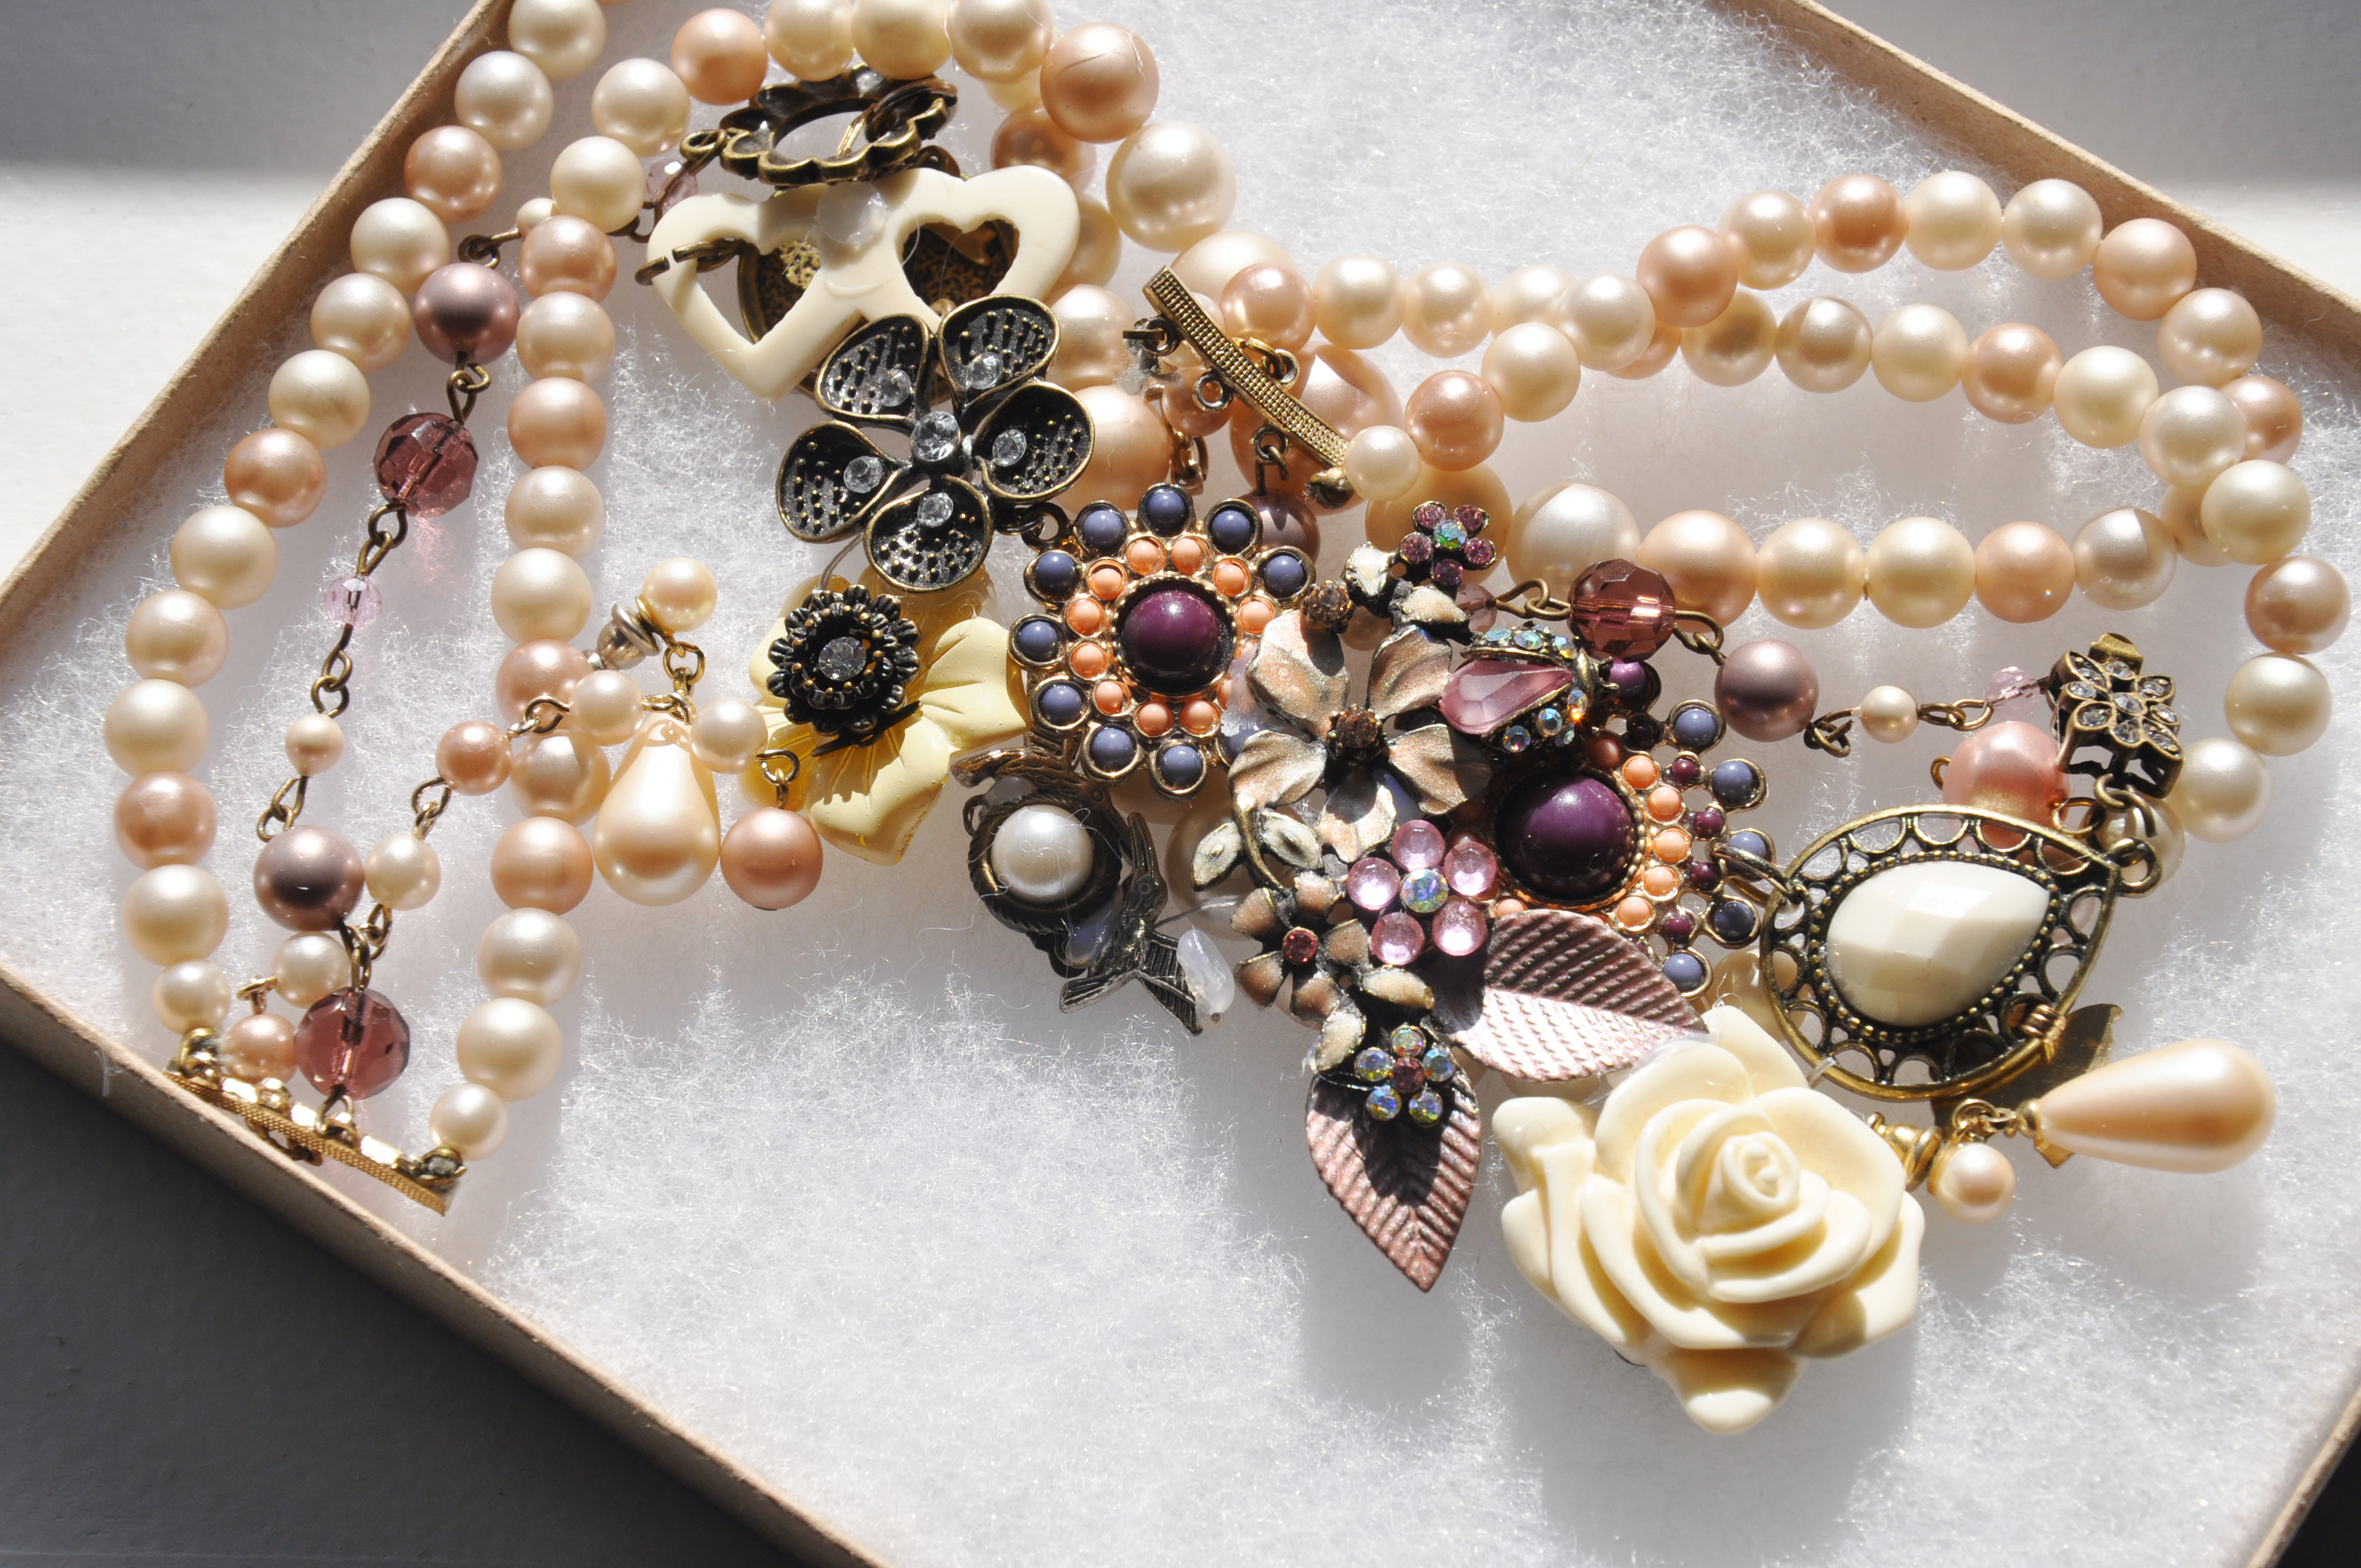
Get creative on the wedding dress, groom’s clothes, and the groom’s men and bride’s maids too. We made the wedding dress from a beautiful corset she bought online, tulle and ribbon. We added the tulle around the top of the corset and made a skirt from it. Then added antique style rhinestone buttons along the bottom. We used a ribbon to hide where the corset and skirt met. She used the lining of an old dress for the lining under the skirt. Then she made a necklace using old brooches and attached them to an inexpensive pearl necklace.


My son wore a suit from Jcrew that he could use again instead of a tux he had to rent that wouldn’t fit very well or buy and never use again. And for his brother the best man we just didn’t buy the jacket so the groom would stand out. The bride’s maids wore dresses that were similar but not matching. The bride found antique off white style she liked for each of her sisters. And everyone except the bride wore sneakers.


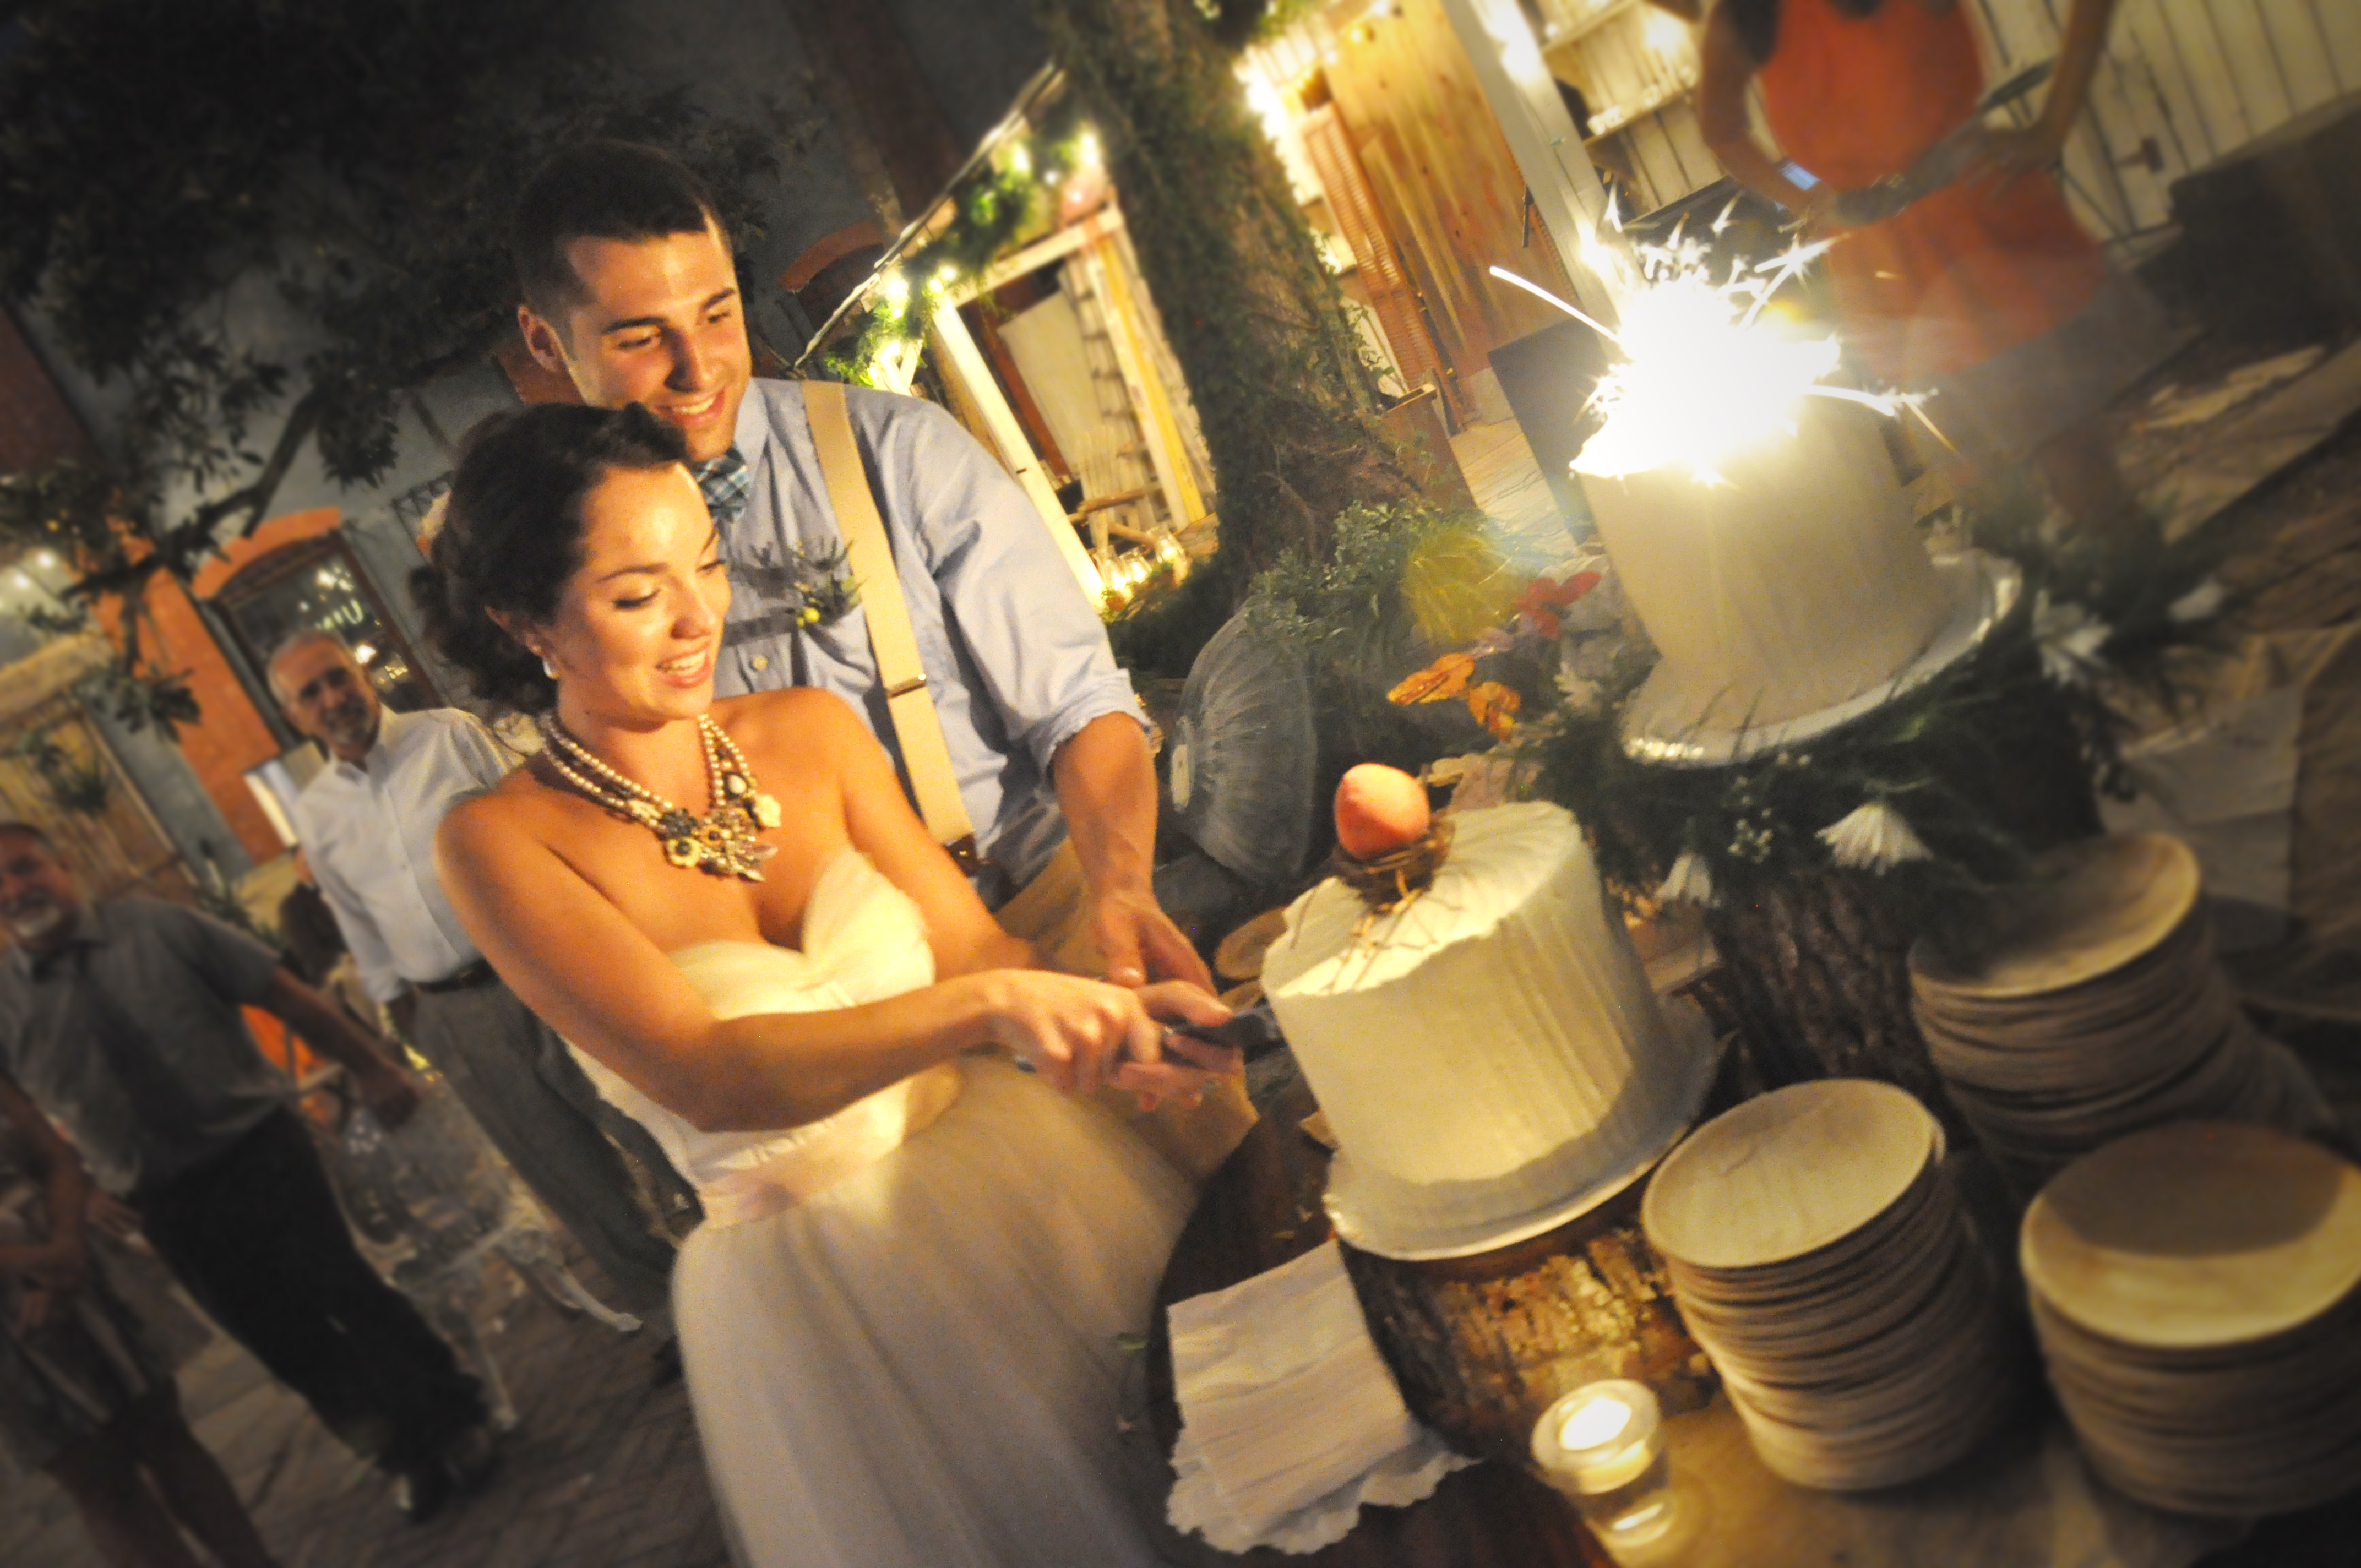
For the cakes we found toppers that worked with the theme but I have to say I’m still a fan of the old school bride and groom or groom and groom or bride and bride as a cake topper. Especially if you have your grandparents or find an antique one.

we used candles

a mini nest from the craft store and an small peach (we wanted an apricot but they weren’t in season yet – improvise)
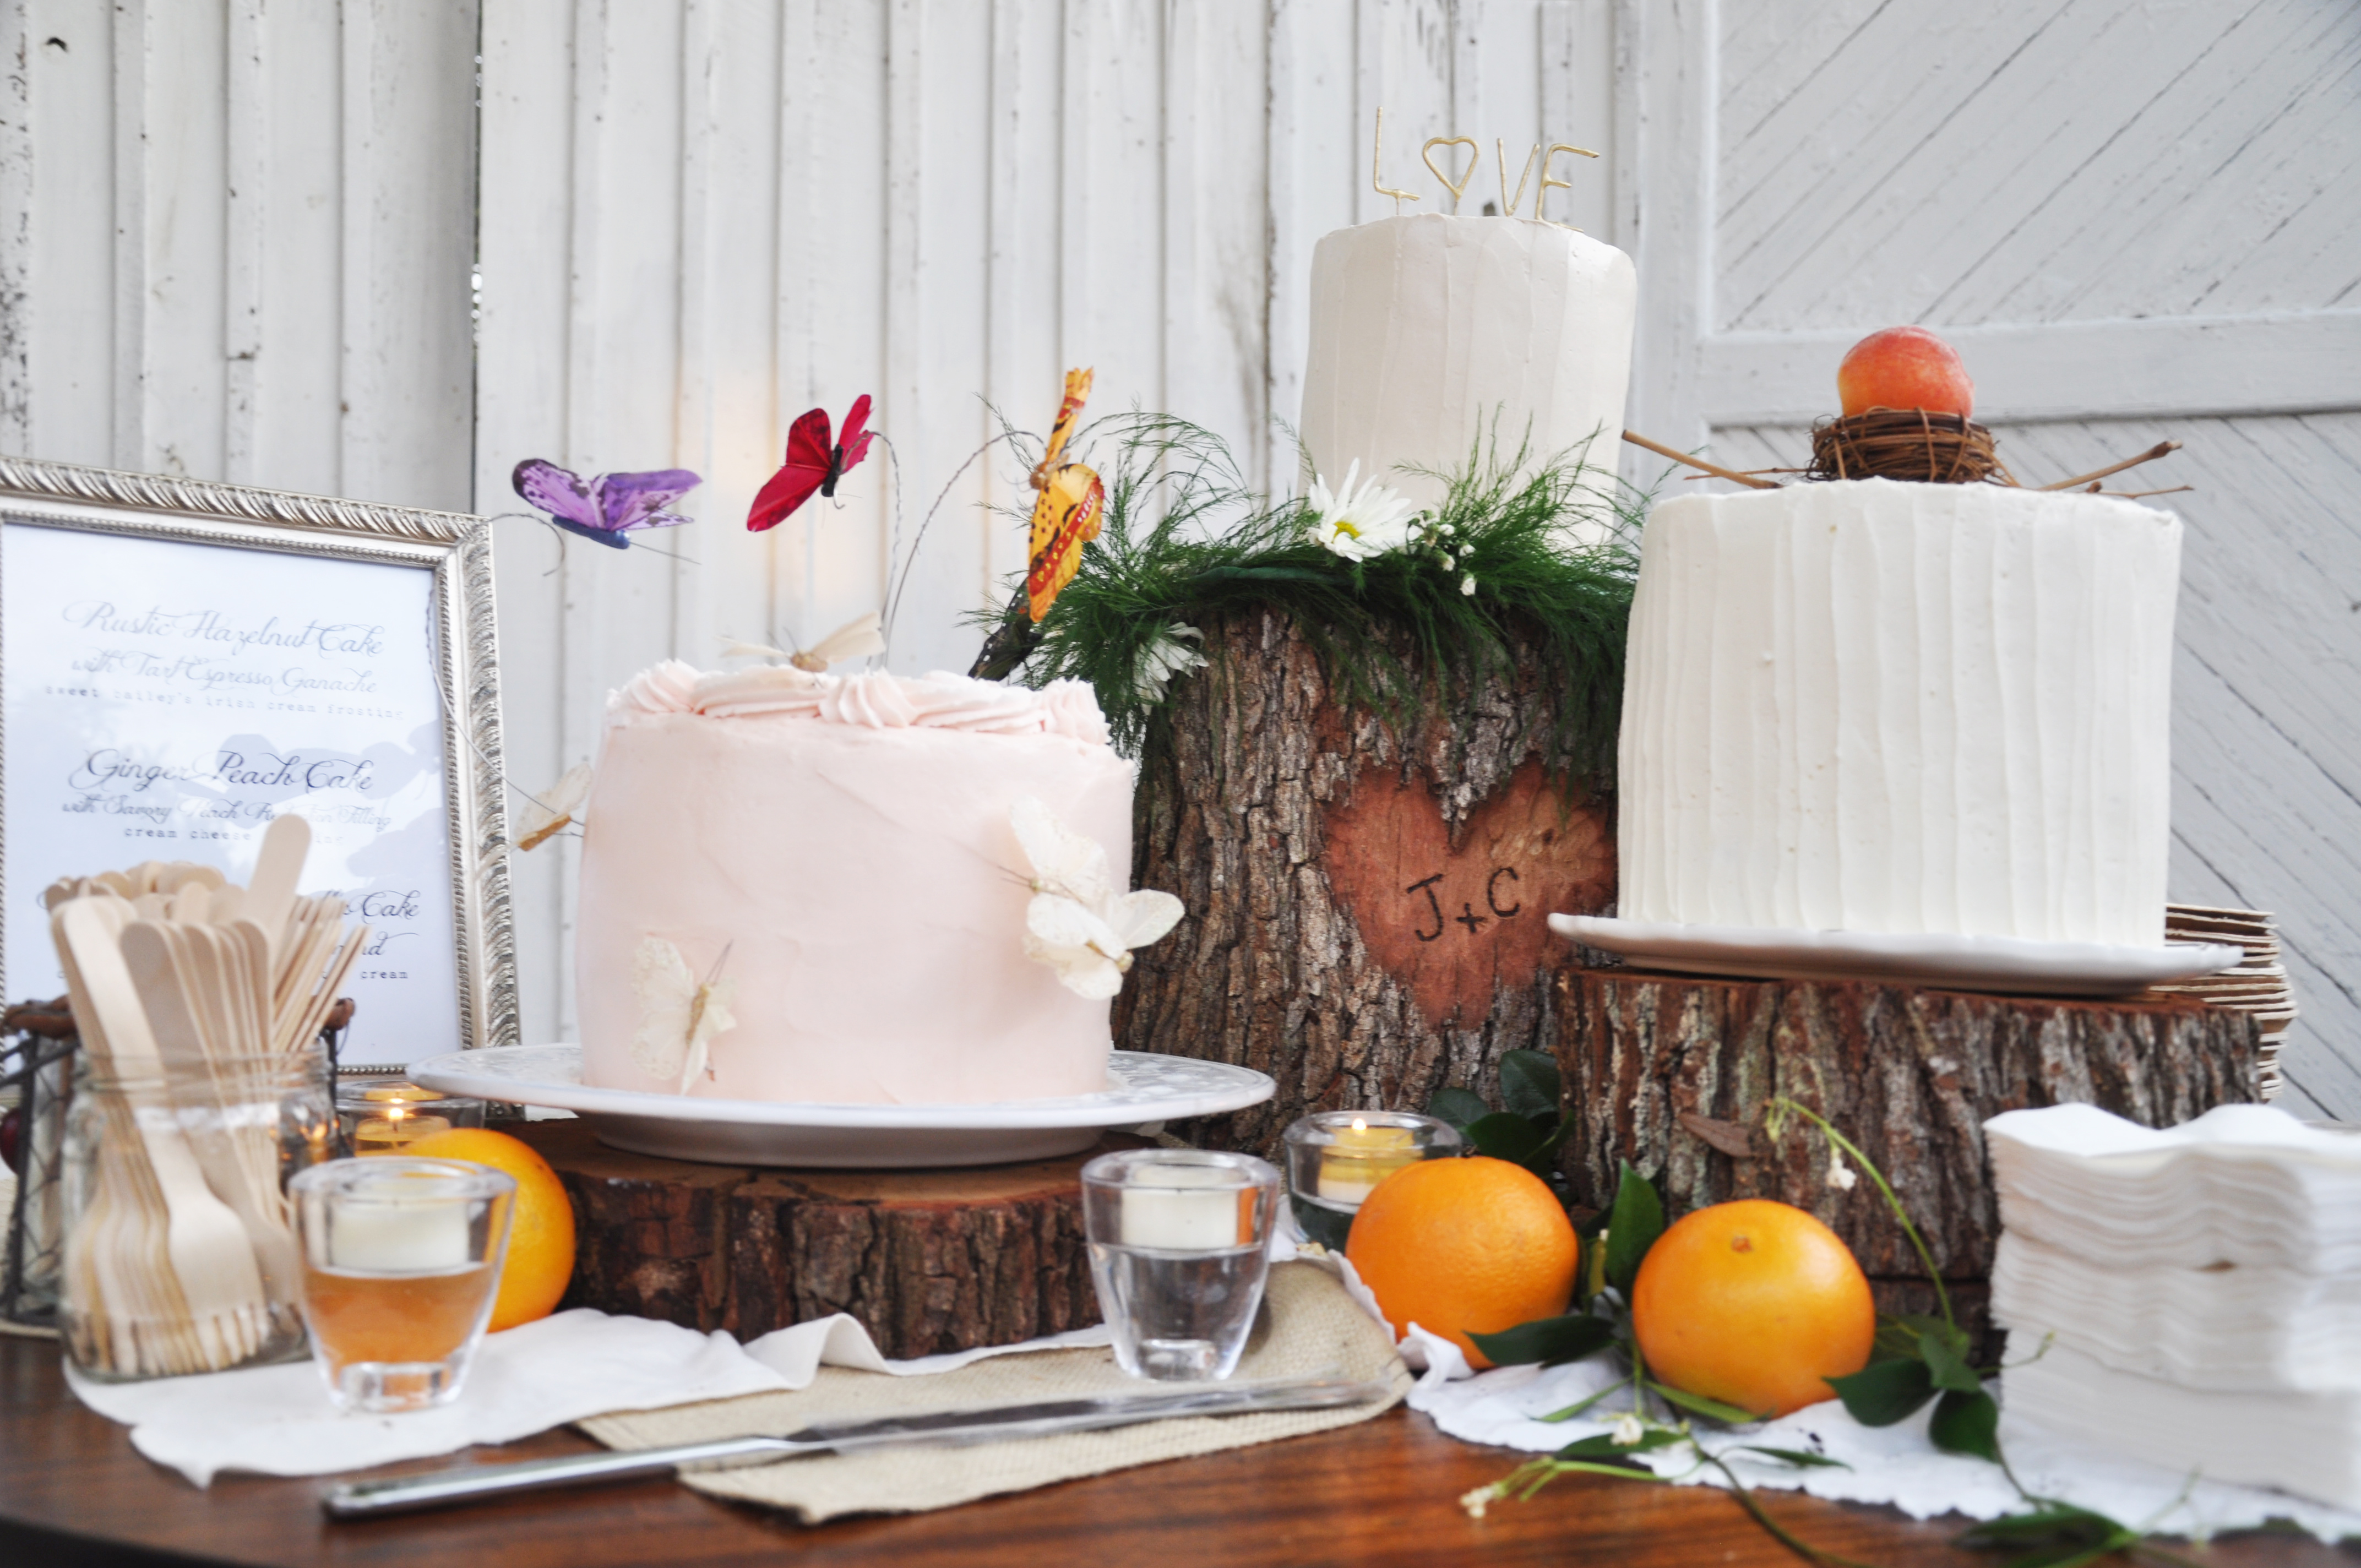
and butterflies also from the craft store. The top cake has a daisy wreath around it from the florist and all 3 cakes are on logs we had a friend cut.

Placed in a corner with birdbaths that were at the bar and a table from my house. (it’s a unique bar it’s the garden area of an architectural antique store).
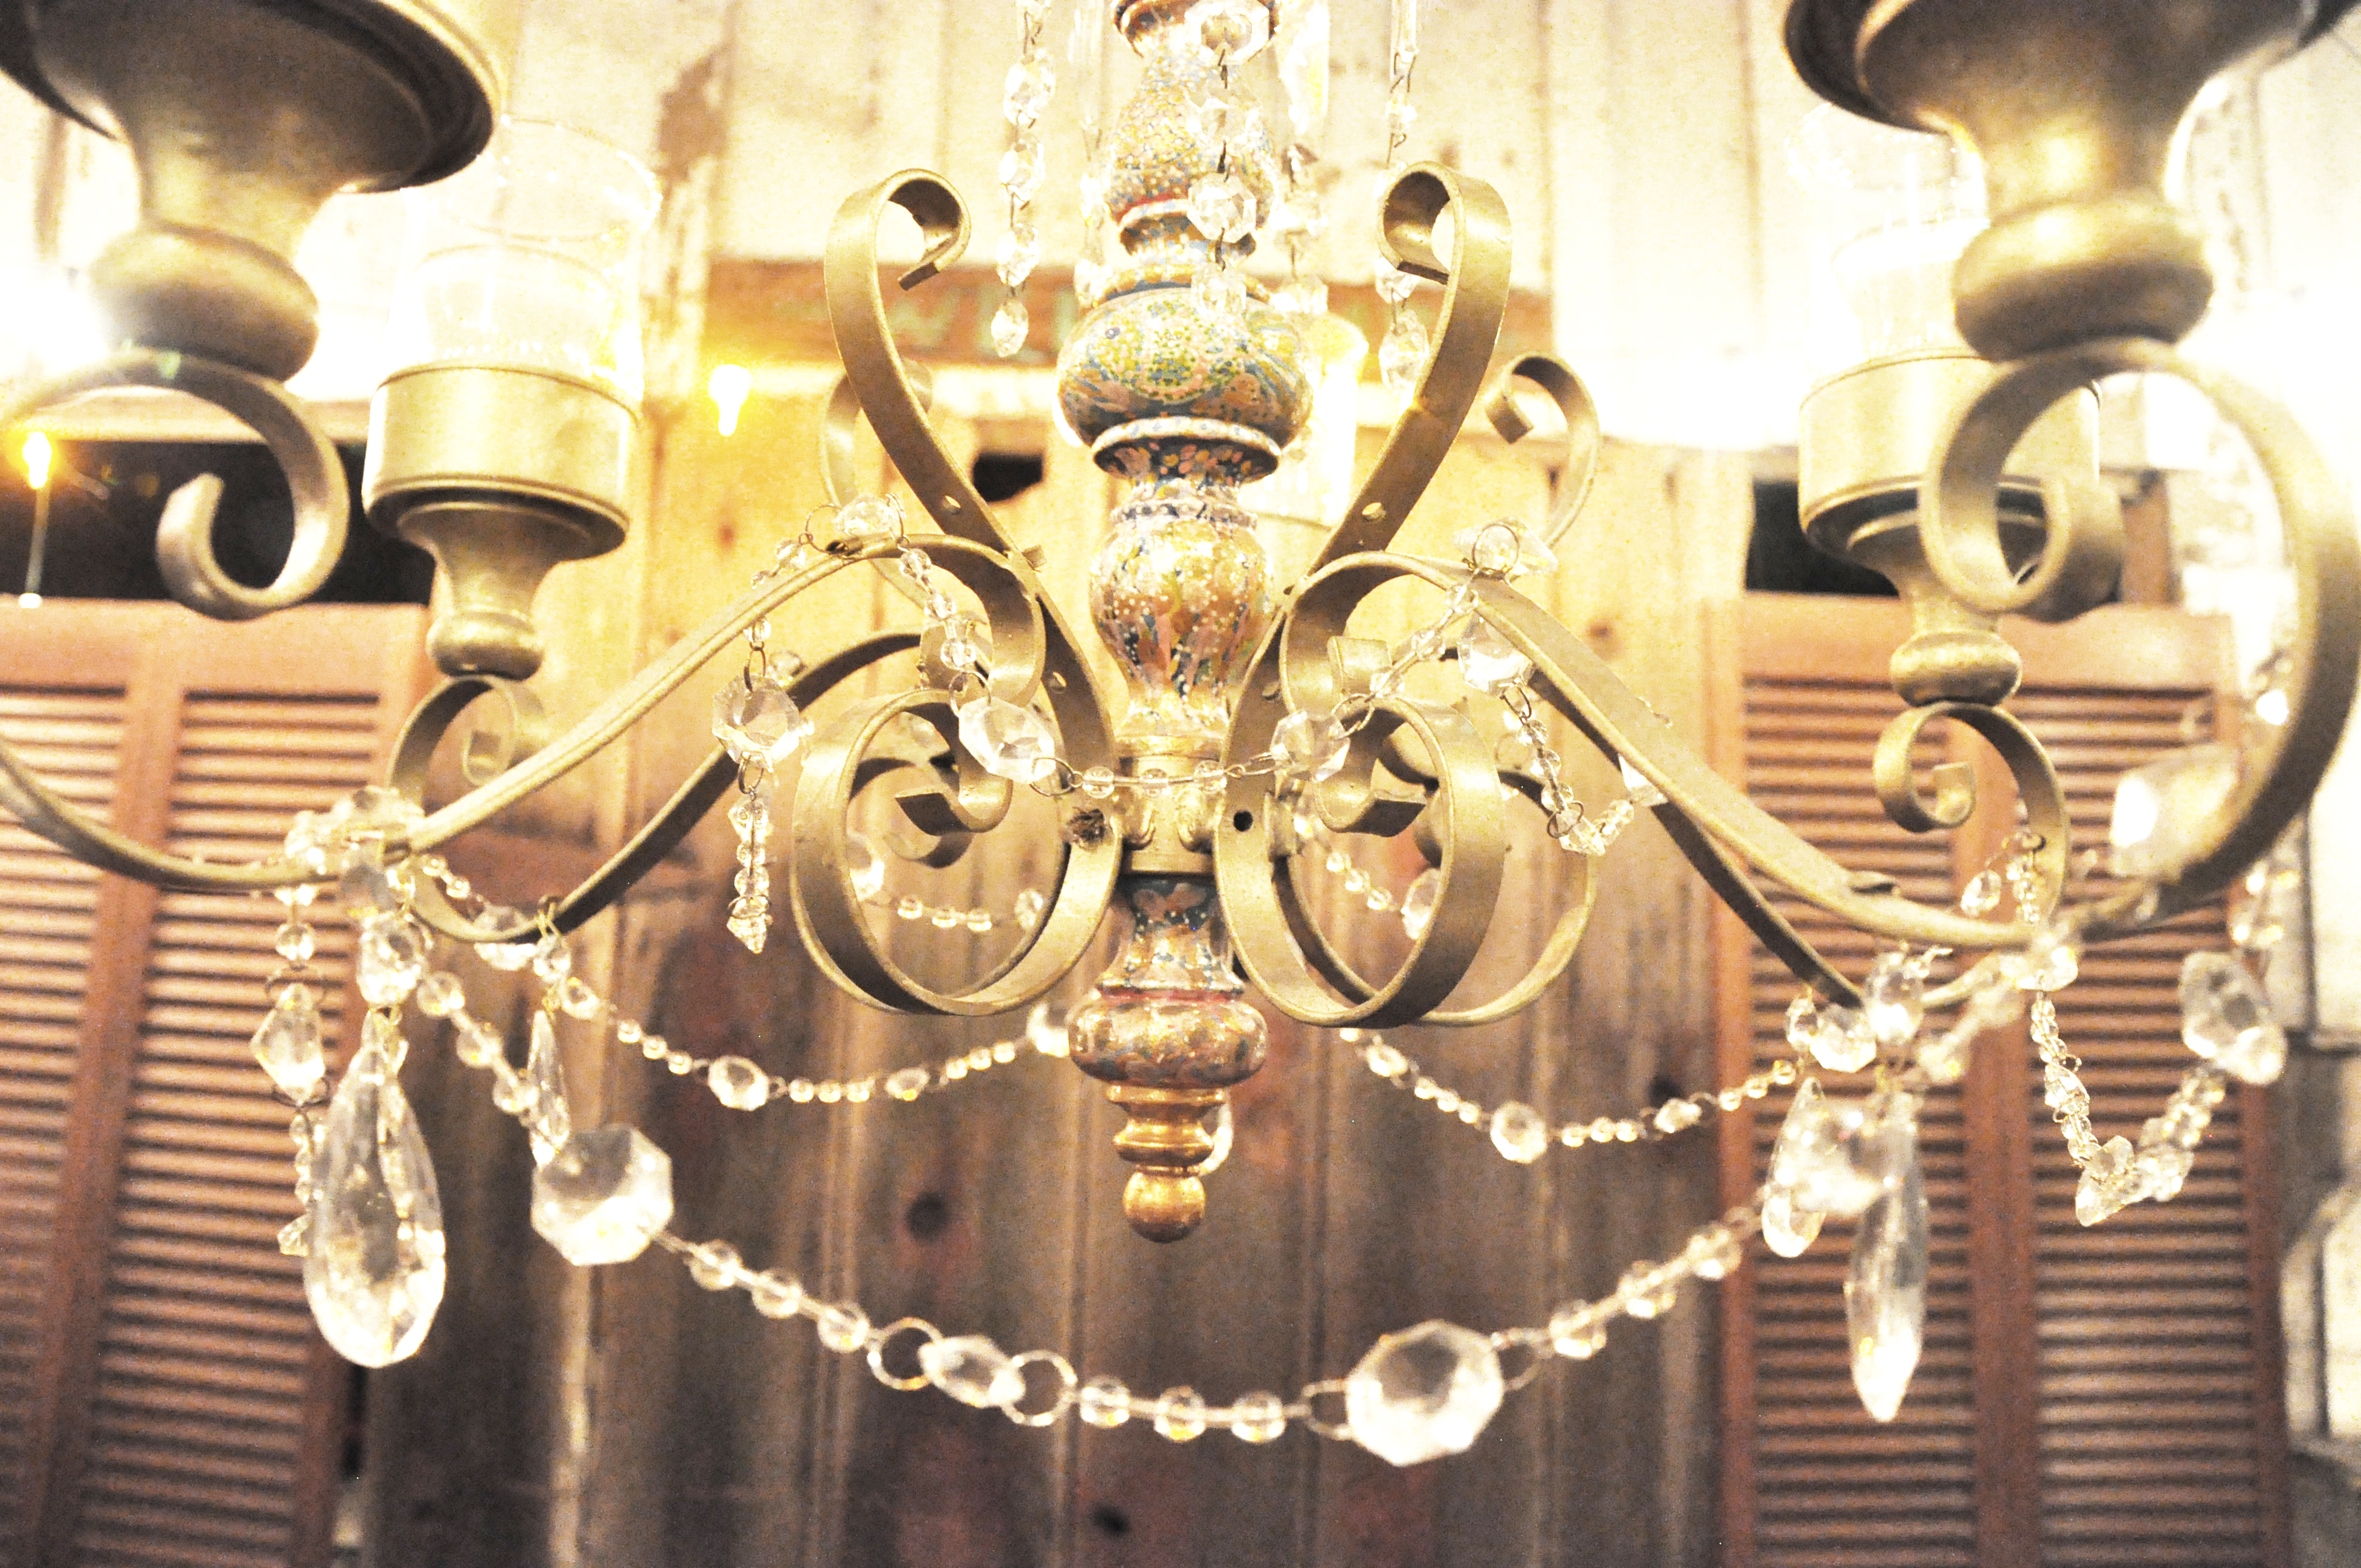
We used tables from my house and borrowed suitcases from a friend for the sign in table and a chandiler my daughter-in-law had for the “alter” area.

We set up a special bride and groom table instead of the long table with the whole wedding party. We used frames on the food table to explain what everything was and at their table as a place card. We had a vase on the table for the bride to put her bouquet so it worked double duty as an arrangement.

The bar was set up on a counter next to the old bathtub in the garden. The tub was filled with ice, beer and wine. The signature drinks, cups, and some bar snacks were set up on the counter. Be sure to note what’s in your signature drinks so kids don’t drink the wrong thing. We had frames with the drink’s name and ingredients next to each dispenser/pitcher. You can also use boards you’ve spray painted with chalk board paint and framed. And boards covered in burlap or any fabric or even moss then frame them and tack a menu or note in the center.


The food was all home made. We figured 1.5 of each item per guest. I picked things that could be made ahead of time and frozen then thawed or heated the day of. Things that are good at room temperature. Fortunately for us we live about 4 blocks from the venue and had a neighbor that wasn’t home so we could us her fridge. But you could definitely rent a freezer/fridge and store it in your garage the week before the wedding. Have family members help make the food. Just keep everything in disposable aluminum trays. They make great containers for leftovers too to give to people.


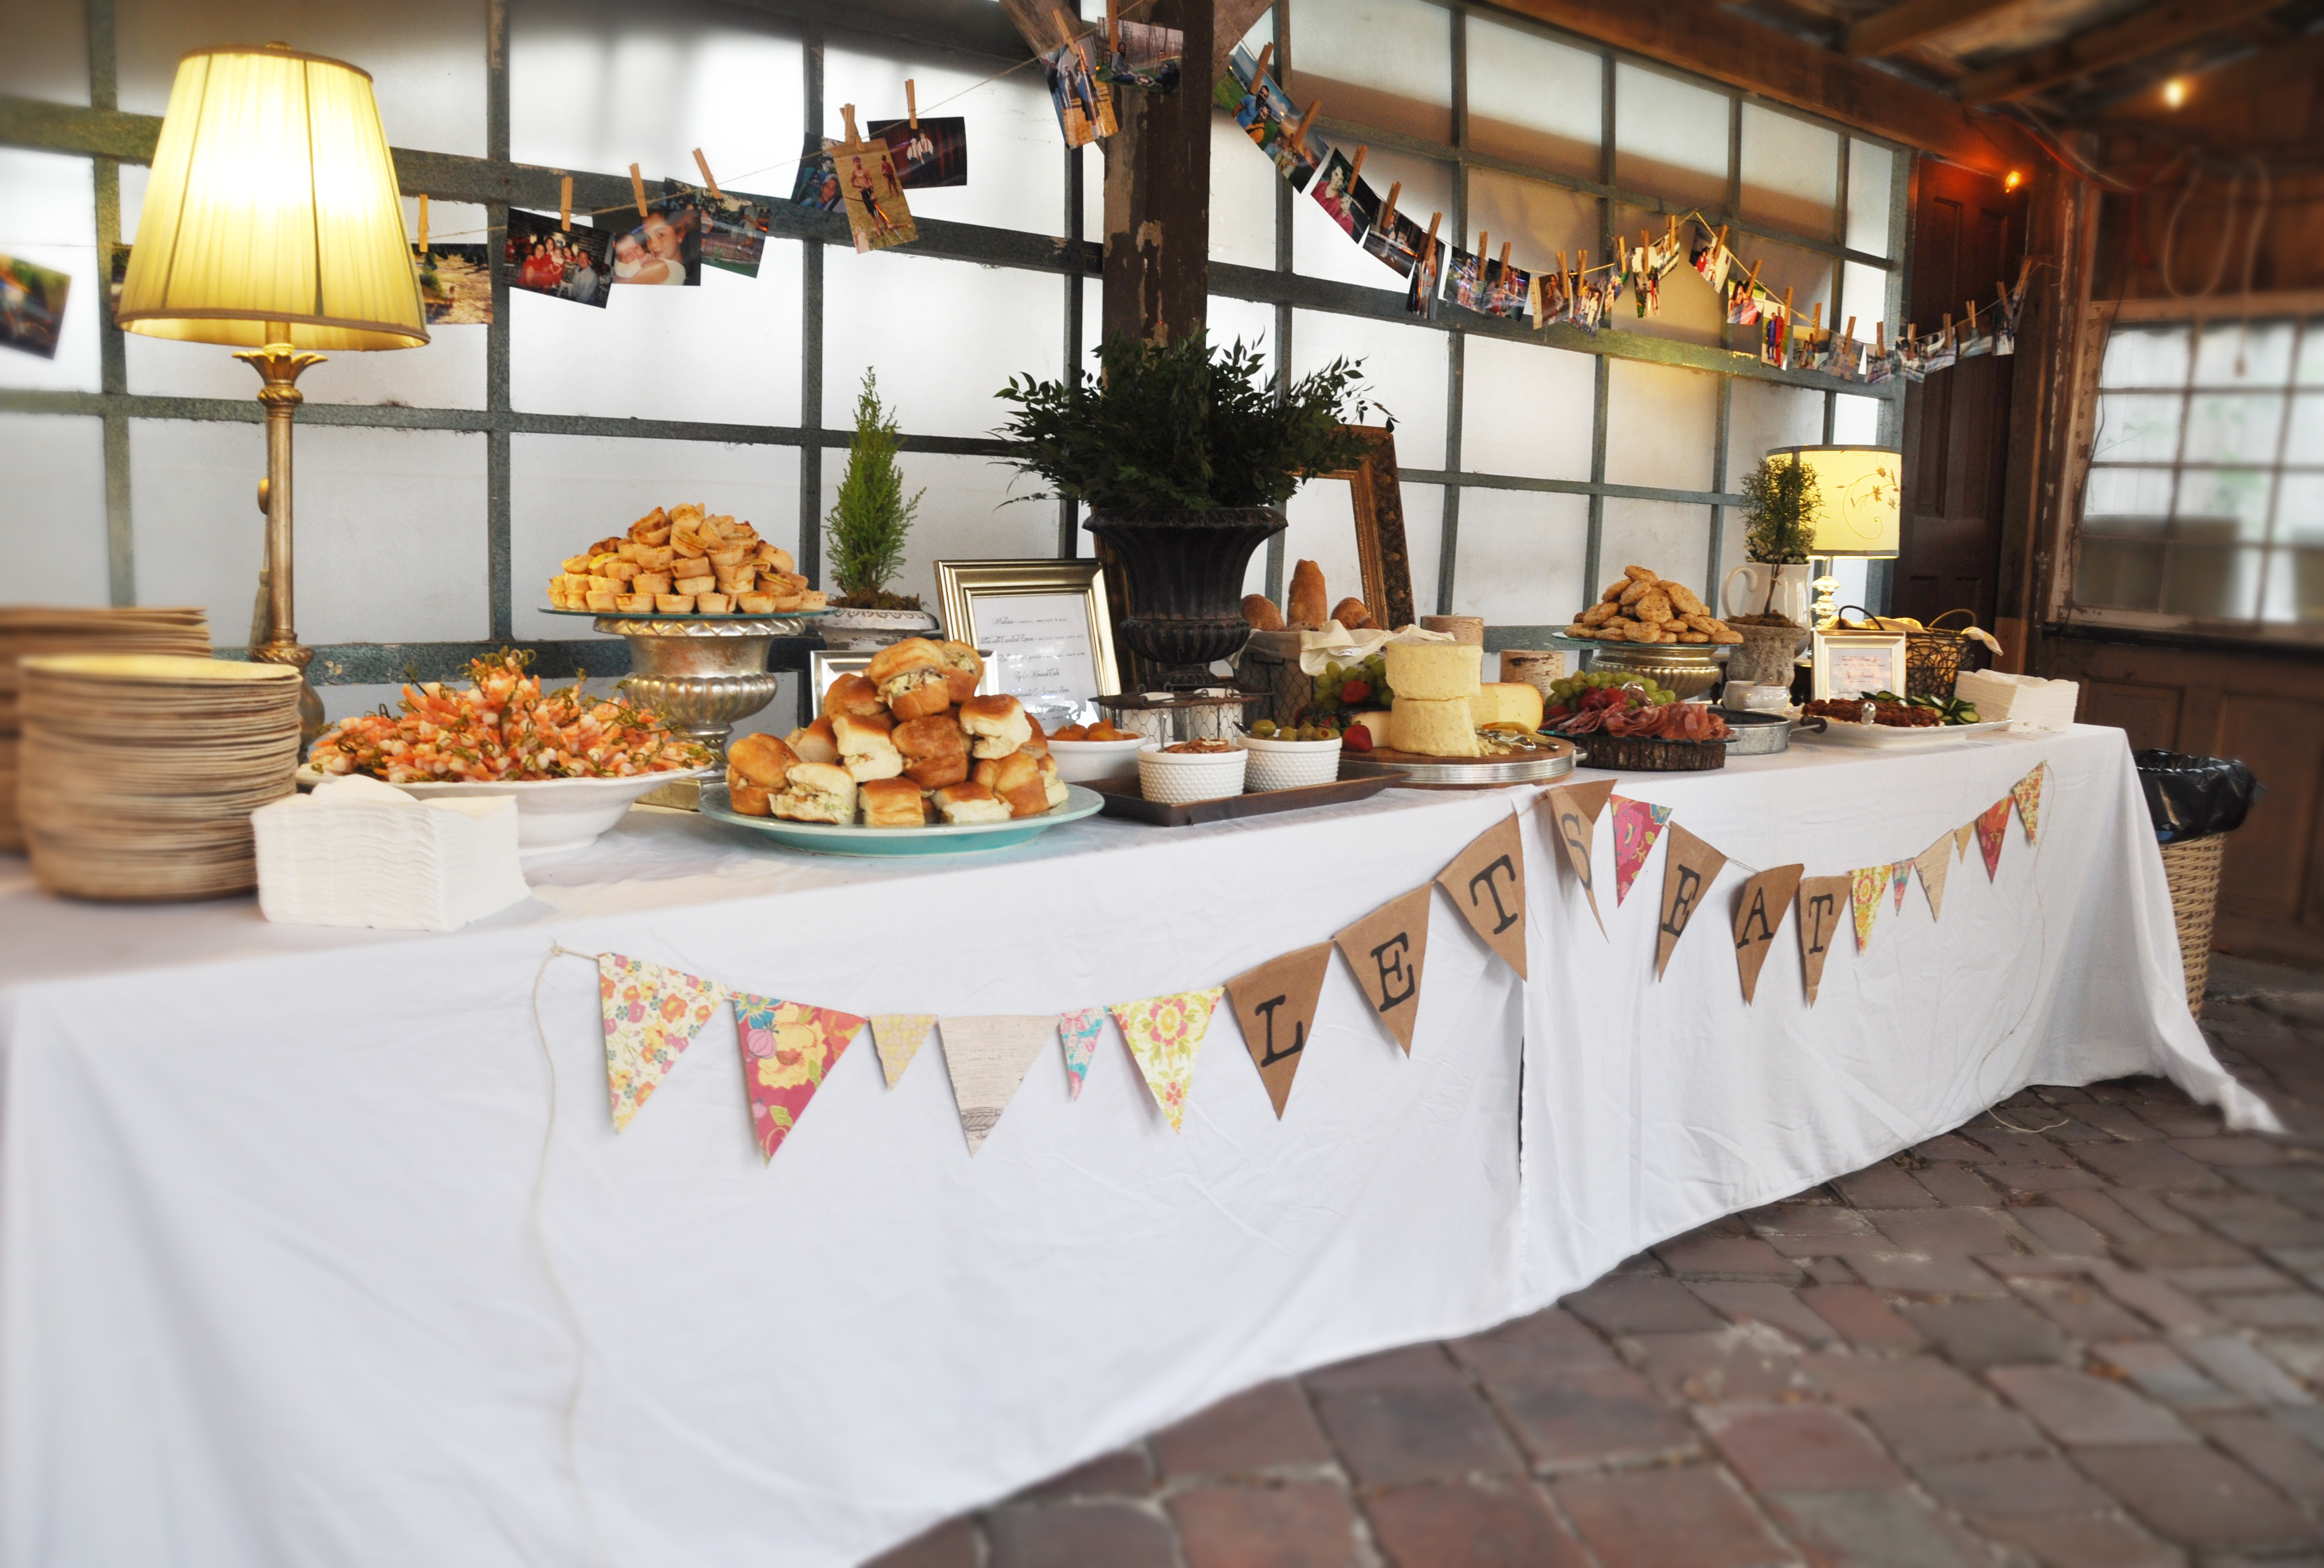
Notice the lamps from home, not only for light but it gave height to the table. The hamper in the corner that we used as a garbage can. The topiaries and urns all from my house. The urn in the middle we just used a bunch of cut greenery instead of a formal arrangement – much cheaper. The table cloths are actually white king sized sheets. My favorite trick. I have a bunch in different colors. So much cheaper then large table cloths. Use lots of different serving trays and containers but be sure they all go together. I used white, wood, and metal. If you don’t have a lot of platters borrow from friends. Just be picky. You want it to all go together and look catered not like a pot luck. Depending on your theme just look at the kind of dishes and platters they use on Pinterest for the style wedding you’re going for then gather that style from friends. Don’t be afraid to throw in a wild card either. Like if you have all very rustic pieces and add a beautiful cut glass bowl. It just makes things interesting.
For the flowers we took a picture of the exact bouquet she wanted to the florist to recreate. The bride’s maids had tin buckets full of dried flower petals we bought online at Save on Crafts. They scattered them as they walked.

We had the small daisy wreath made for the cake and the rest were all just bunches of flowers and greenery. We picked everything up from the florist in buckets full of water and then the day of the wedding we just cut and placed everything in the containers. So much cheaper and it looked beautiful. For amazing floral designs whether you’re just going to get the bride’s bouquet or arrangements for all the tables I love Julia’s Floral Design!
When they left we had a cool garden pot filled with sand and stuck sparklers in it everyone grabbed a sparkler and lit it as they walked through the gates and jumped on their bikes (decked out with hydrangeas in the basket and used as decoration during the event) and rode off (we live 4 blocks away so they rode back to the house but you could have a car stashed a block away to ride to as well. With someone there waiting to collect the bikes.


When it was all over we cleaned up and went home.
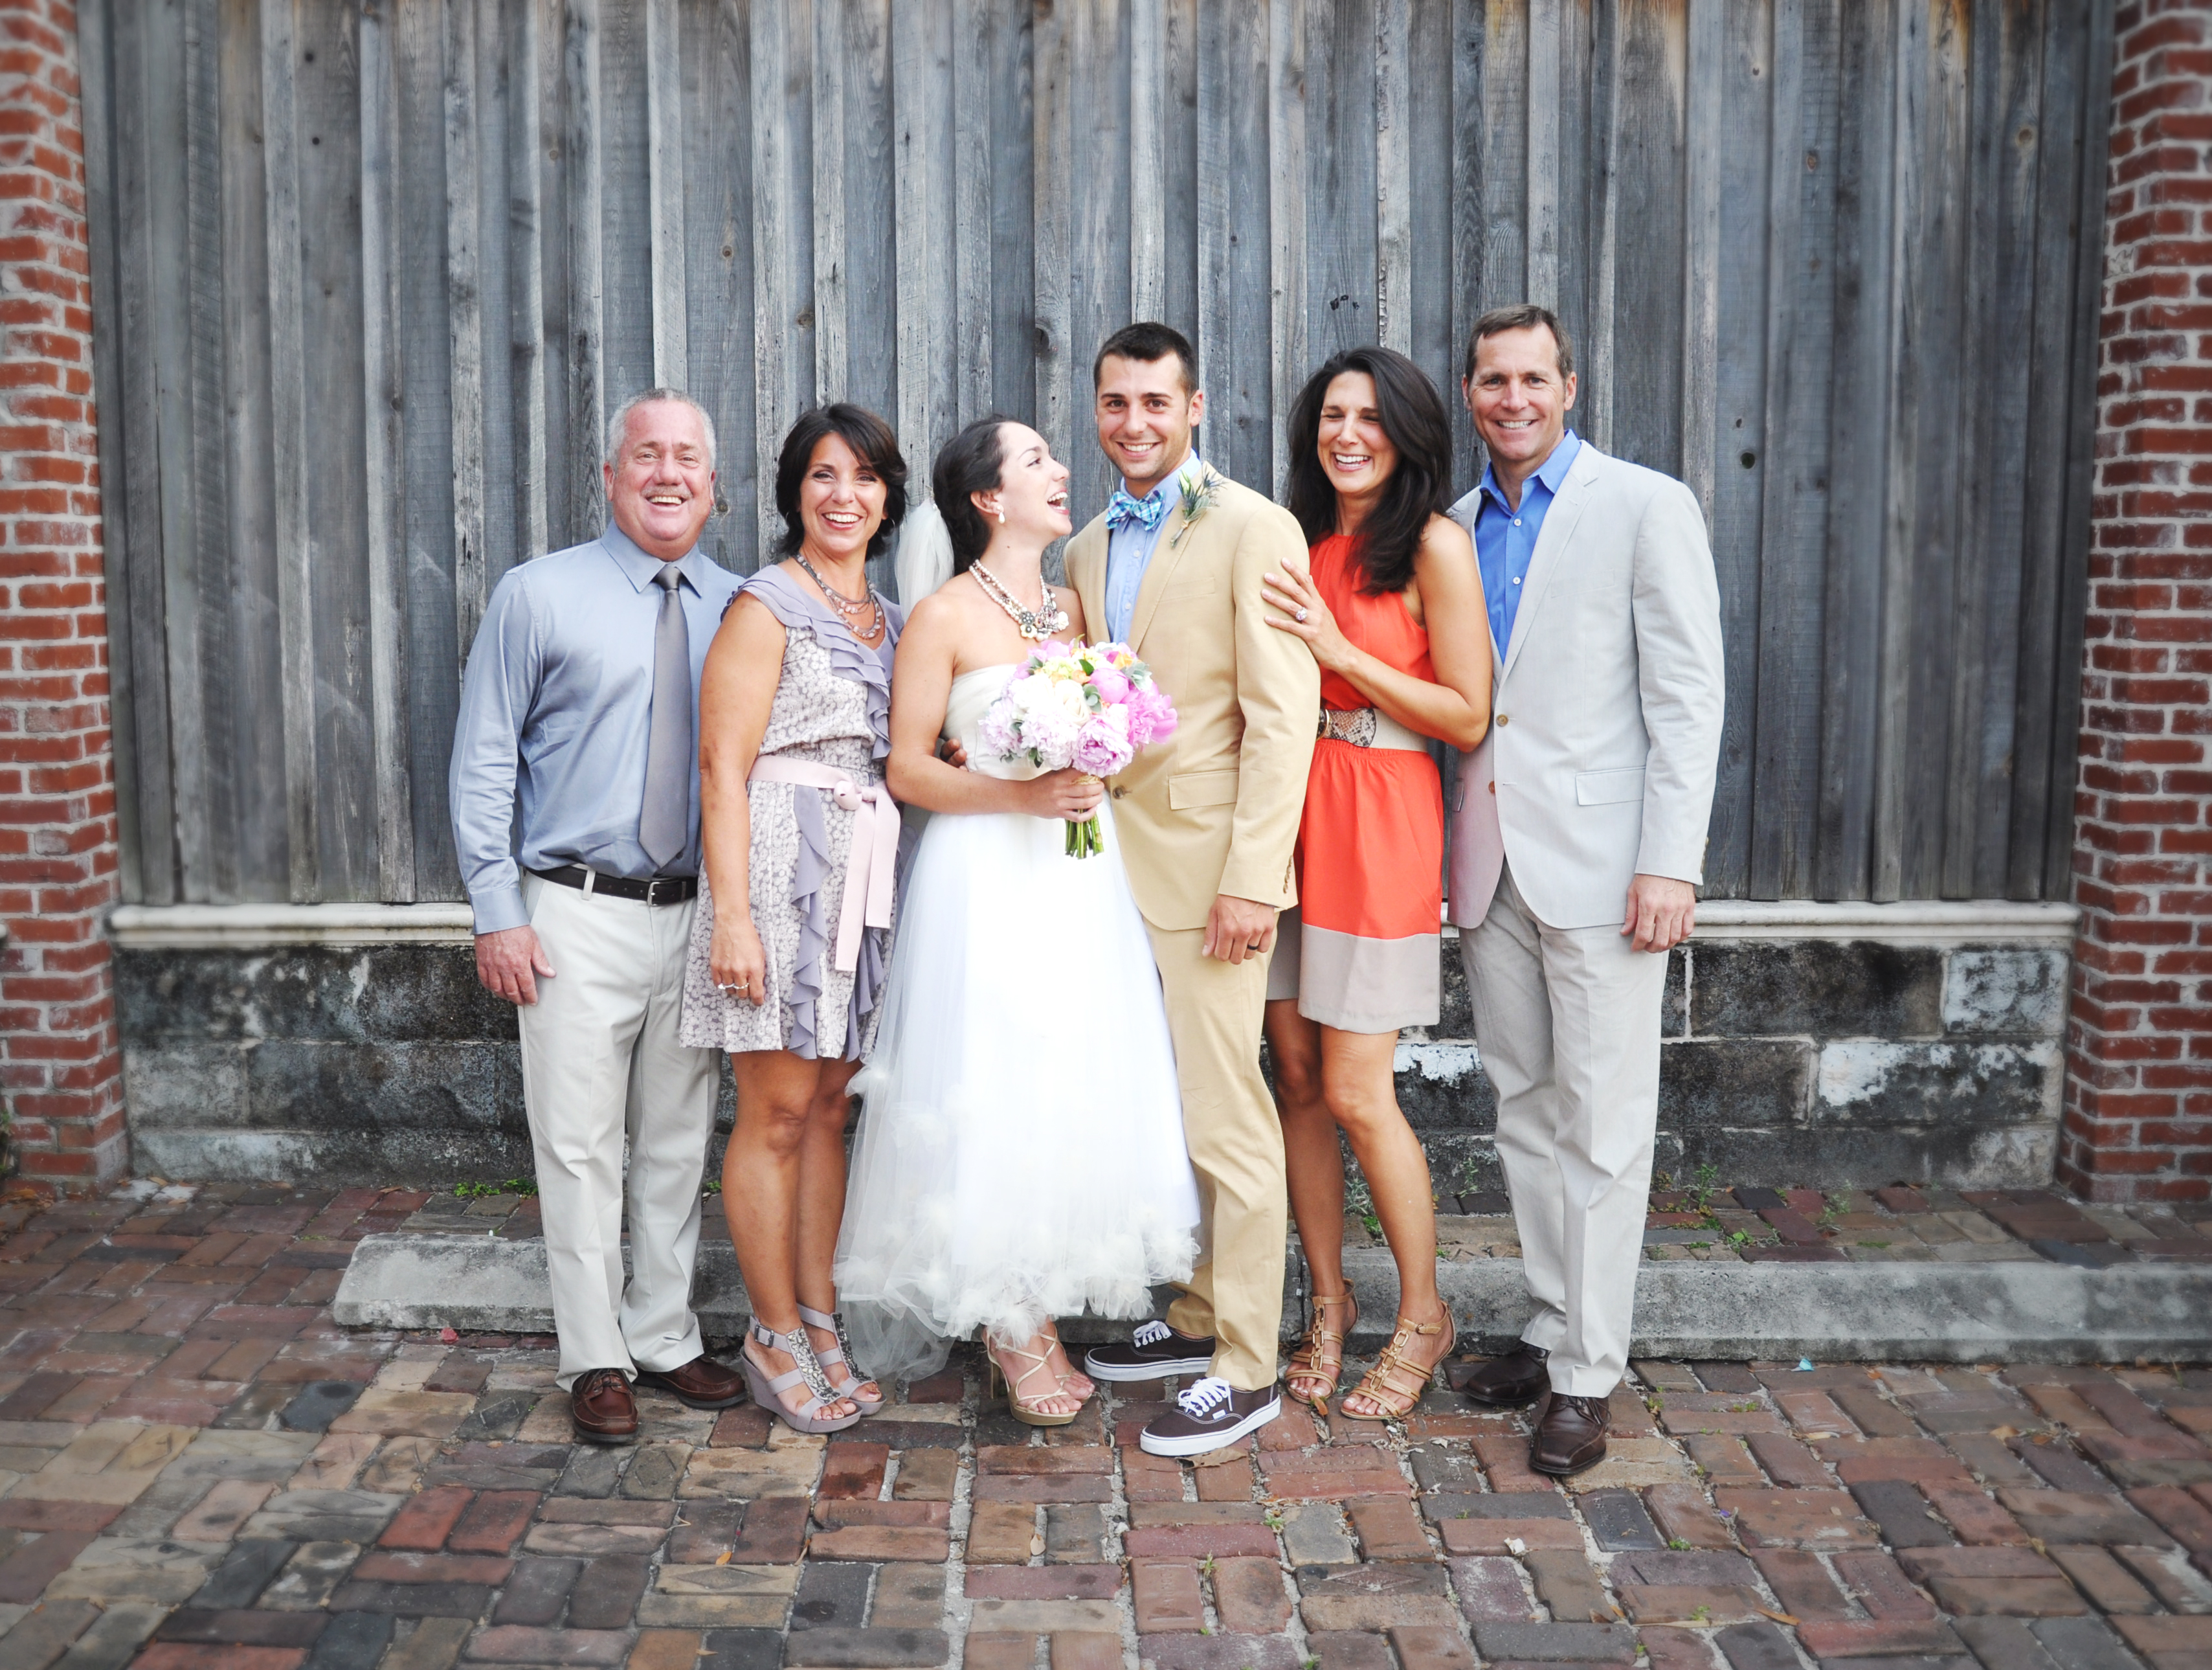
For the photos. First, pick the right photographer, we used Jenna Alexander and as you can see the photos were beautiful! They need to take beautiful photos that capture the feel of your wedding and really make it look even better then it was. Check out Jenna’s and my daughter-in-laws’ website Carly Robertson Photography to see what I mean. Have your photographer take photos before the wedding in a location(s) you love. Photos of each of you getting ready especially with the bride’s maids, groom’s men and mothers or fathers. At the wedding plan in advance what you want photos of – the couple with each set of parents, the couple with the wedding party etc. Write it down and give it to the photographer so it all goes quickly. There’s nothing more annoying then waiting hours for the wedding party to arrive. Also, serve at least appetizers or snacks and open the bar for everyone while they wait. But trust me. The photos you’ll love the most will be the candid shots the photographer takes not the posed ones. So don’t go crazy with combos of family the day of the wedding. Get one with just your immediate family, one with both parents, one with the wedding party and one with the whole family. That will be fine. Trust me. My favorite photo from my wedding you can’t even see our faces.
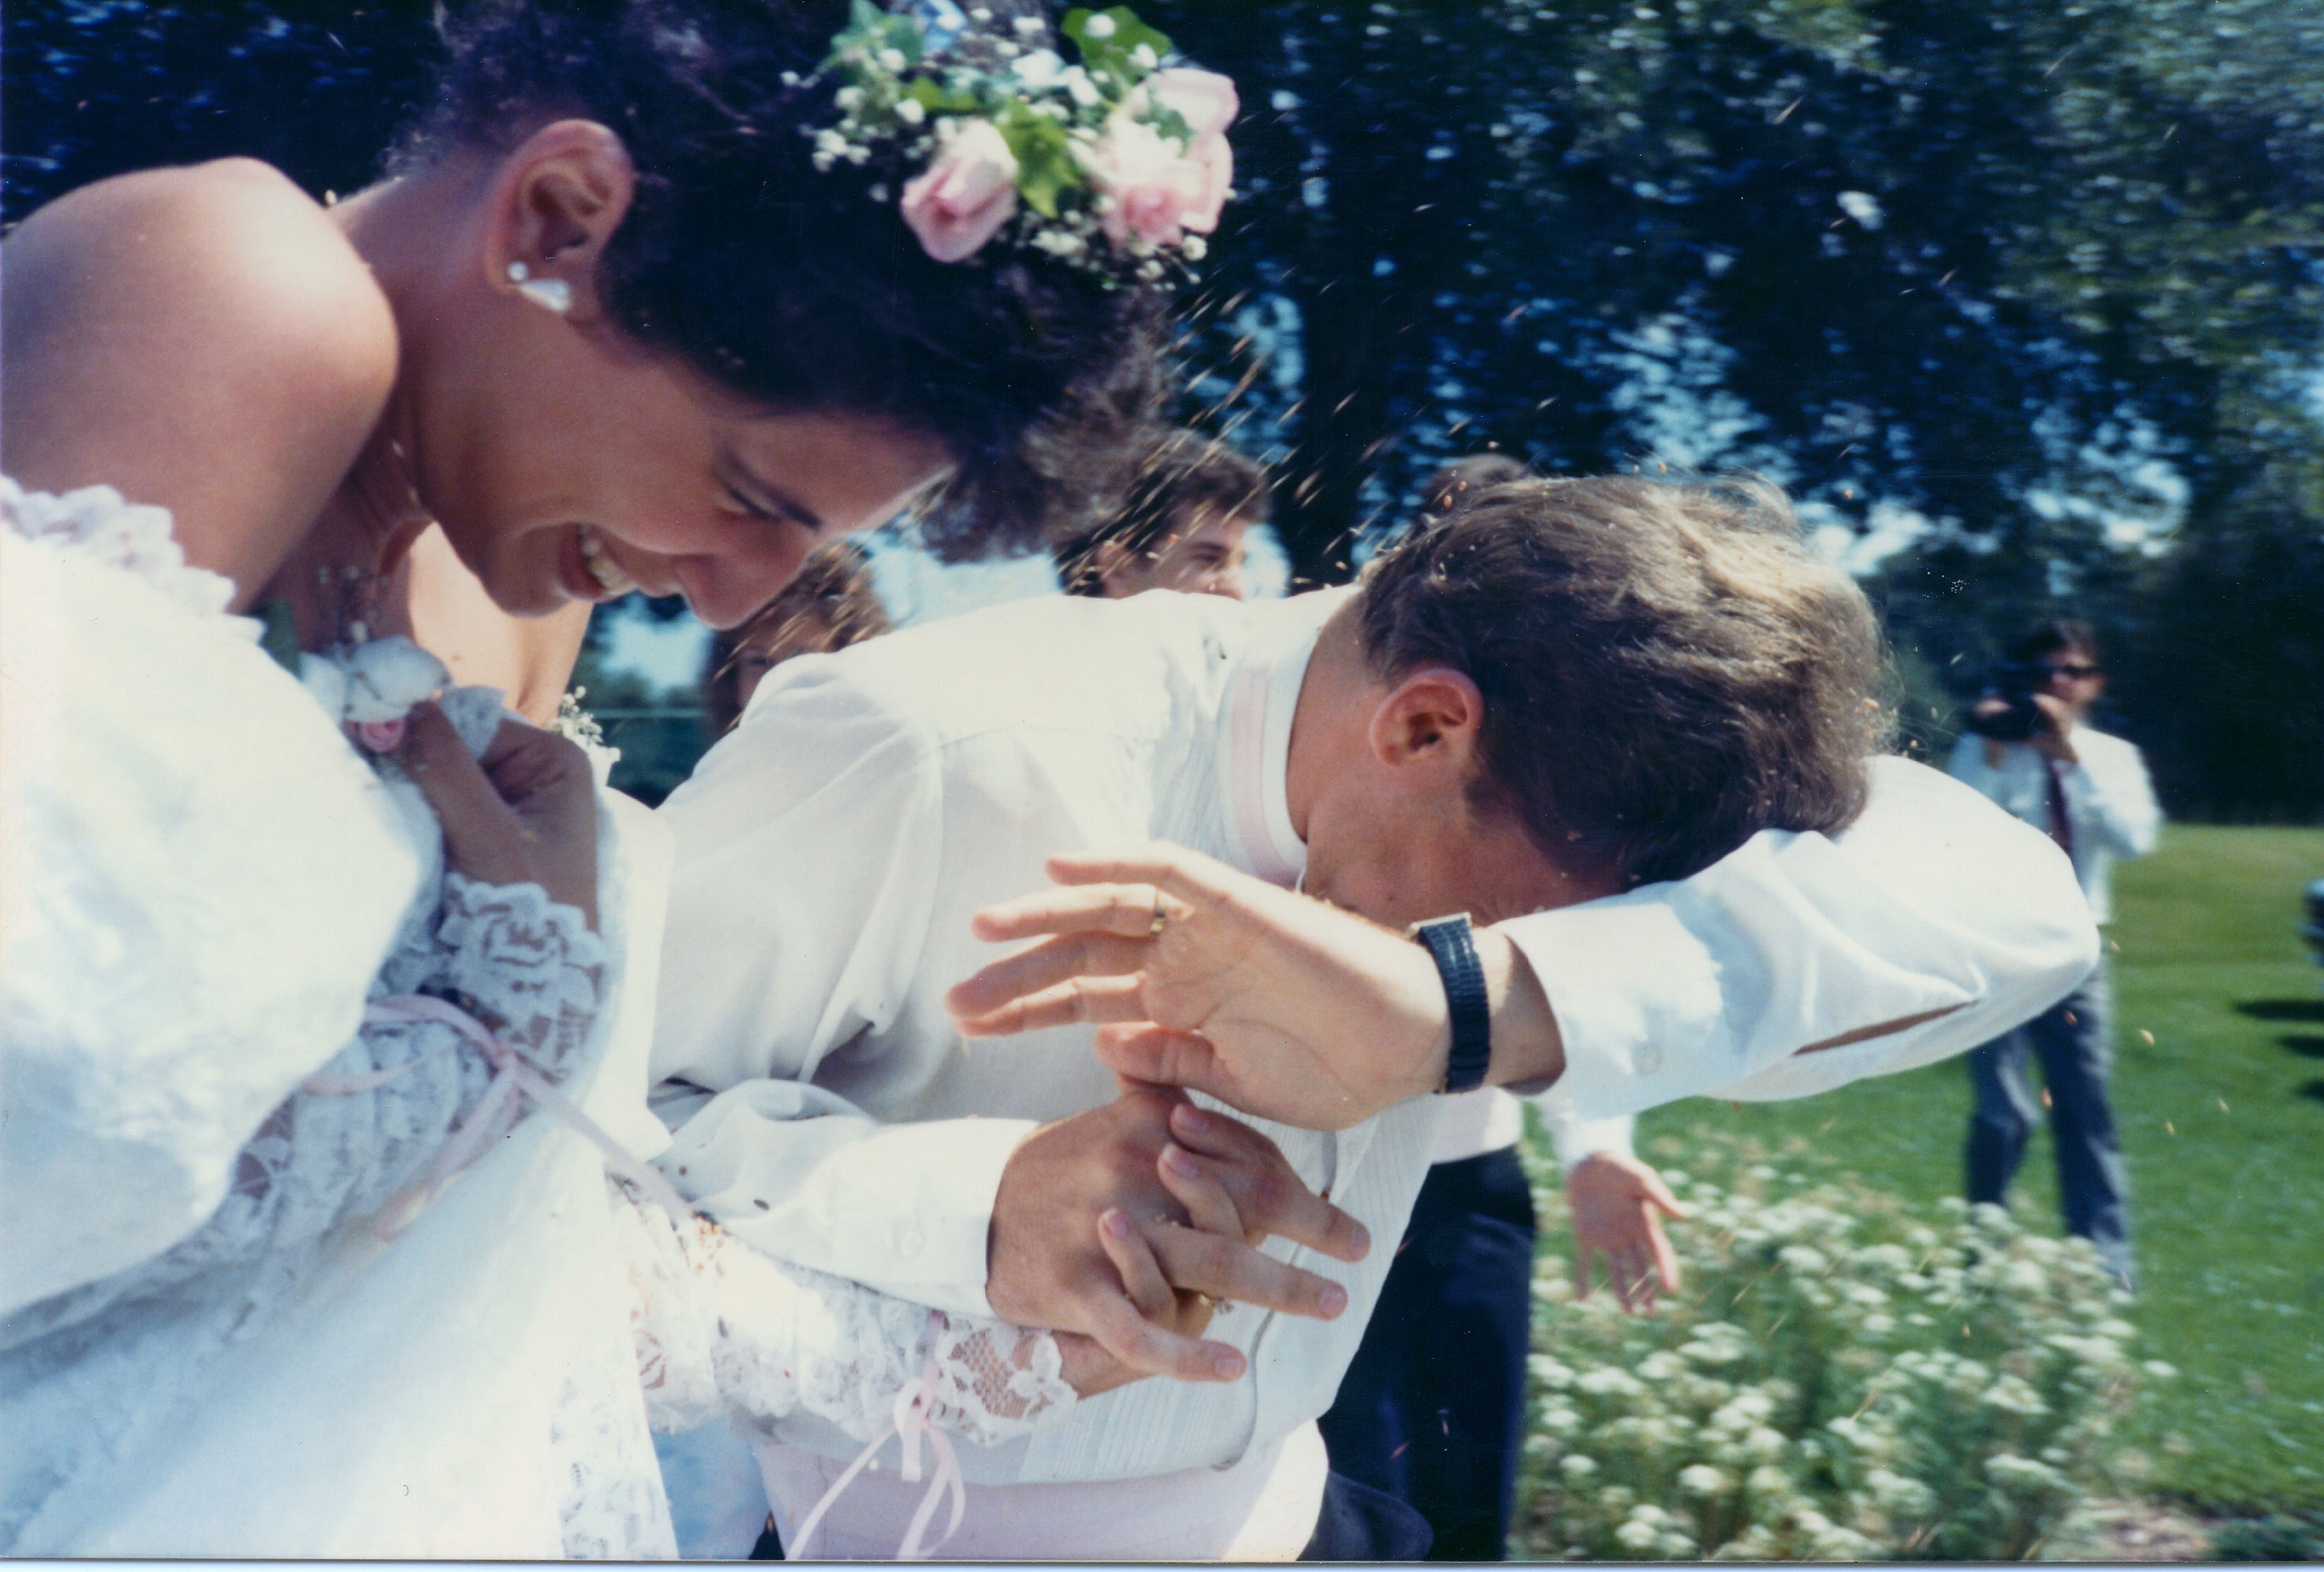
Or my dress which is a good thing because it was the most ridiculous 1986 princess dress ever. But I was 20 and it was 1986.
What I could have done if only Pinterest and the internet had been around then!
